Final steps before shaping the step-sided Red Sea Dhow Hull
Using the Bread-and-Butter Technique for Solid Hull Model Ship Construction
Creating Stem and Stern Templates and Reference Marks for Sections
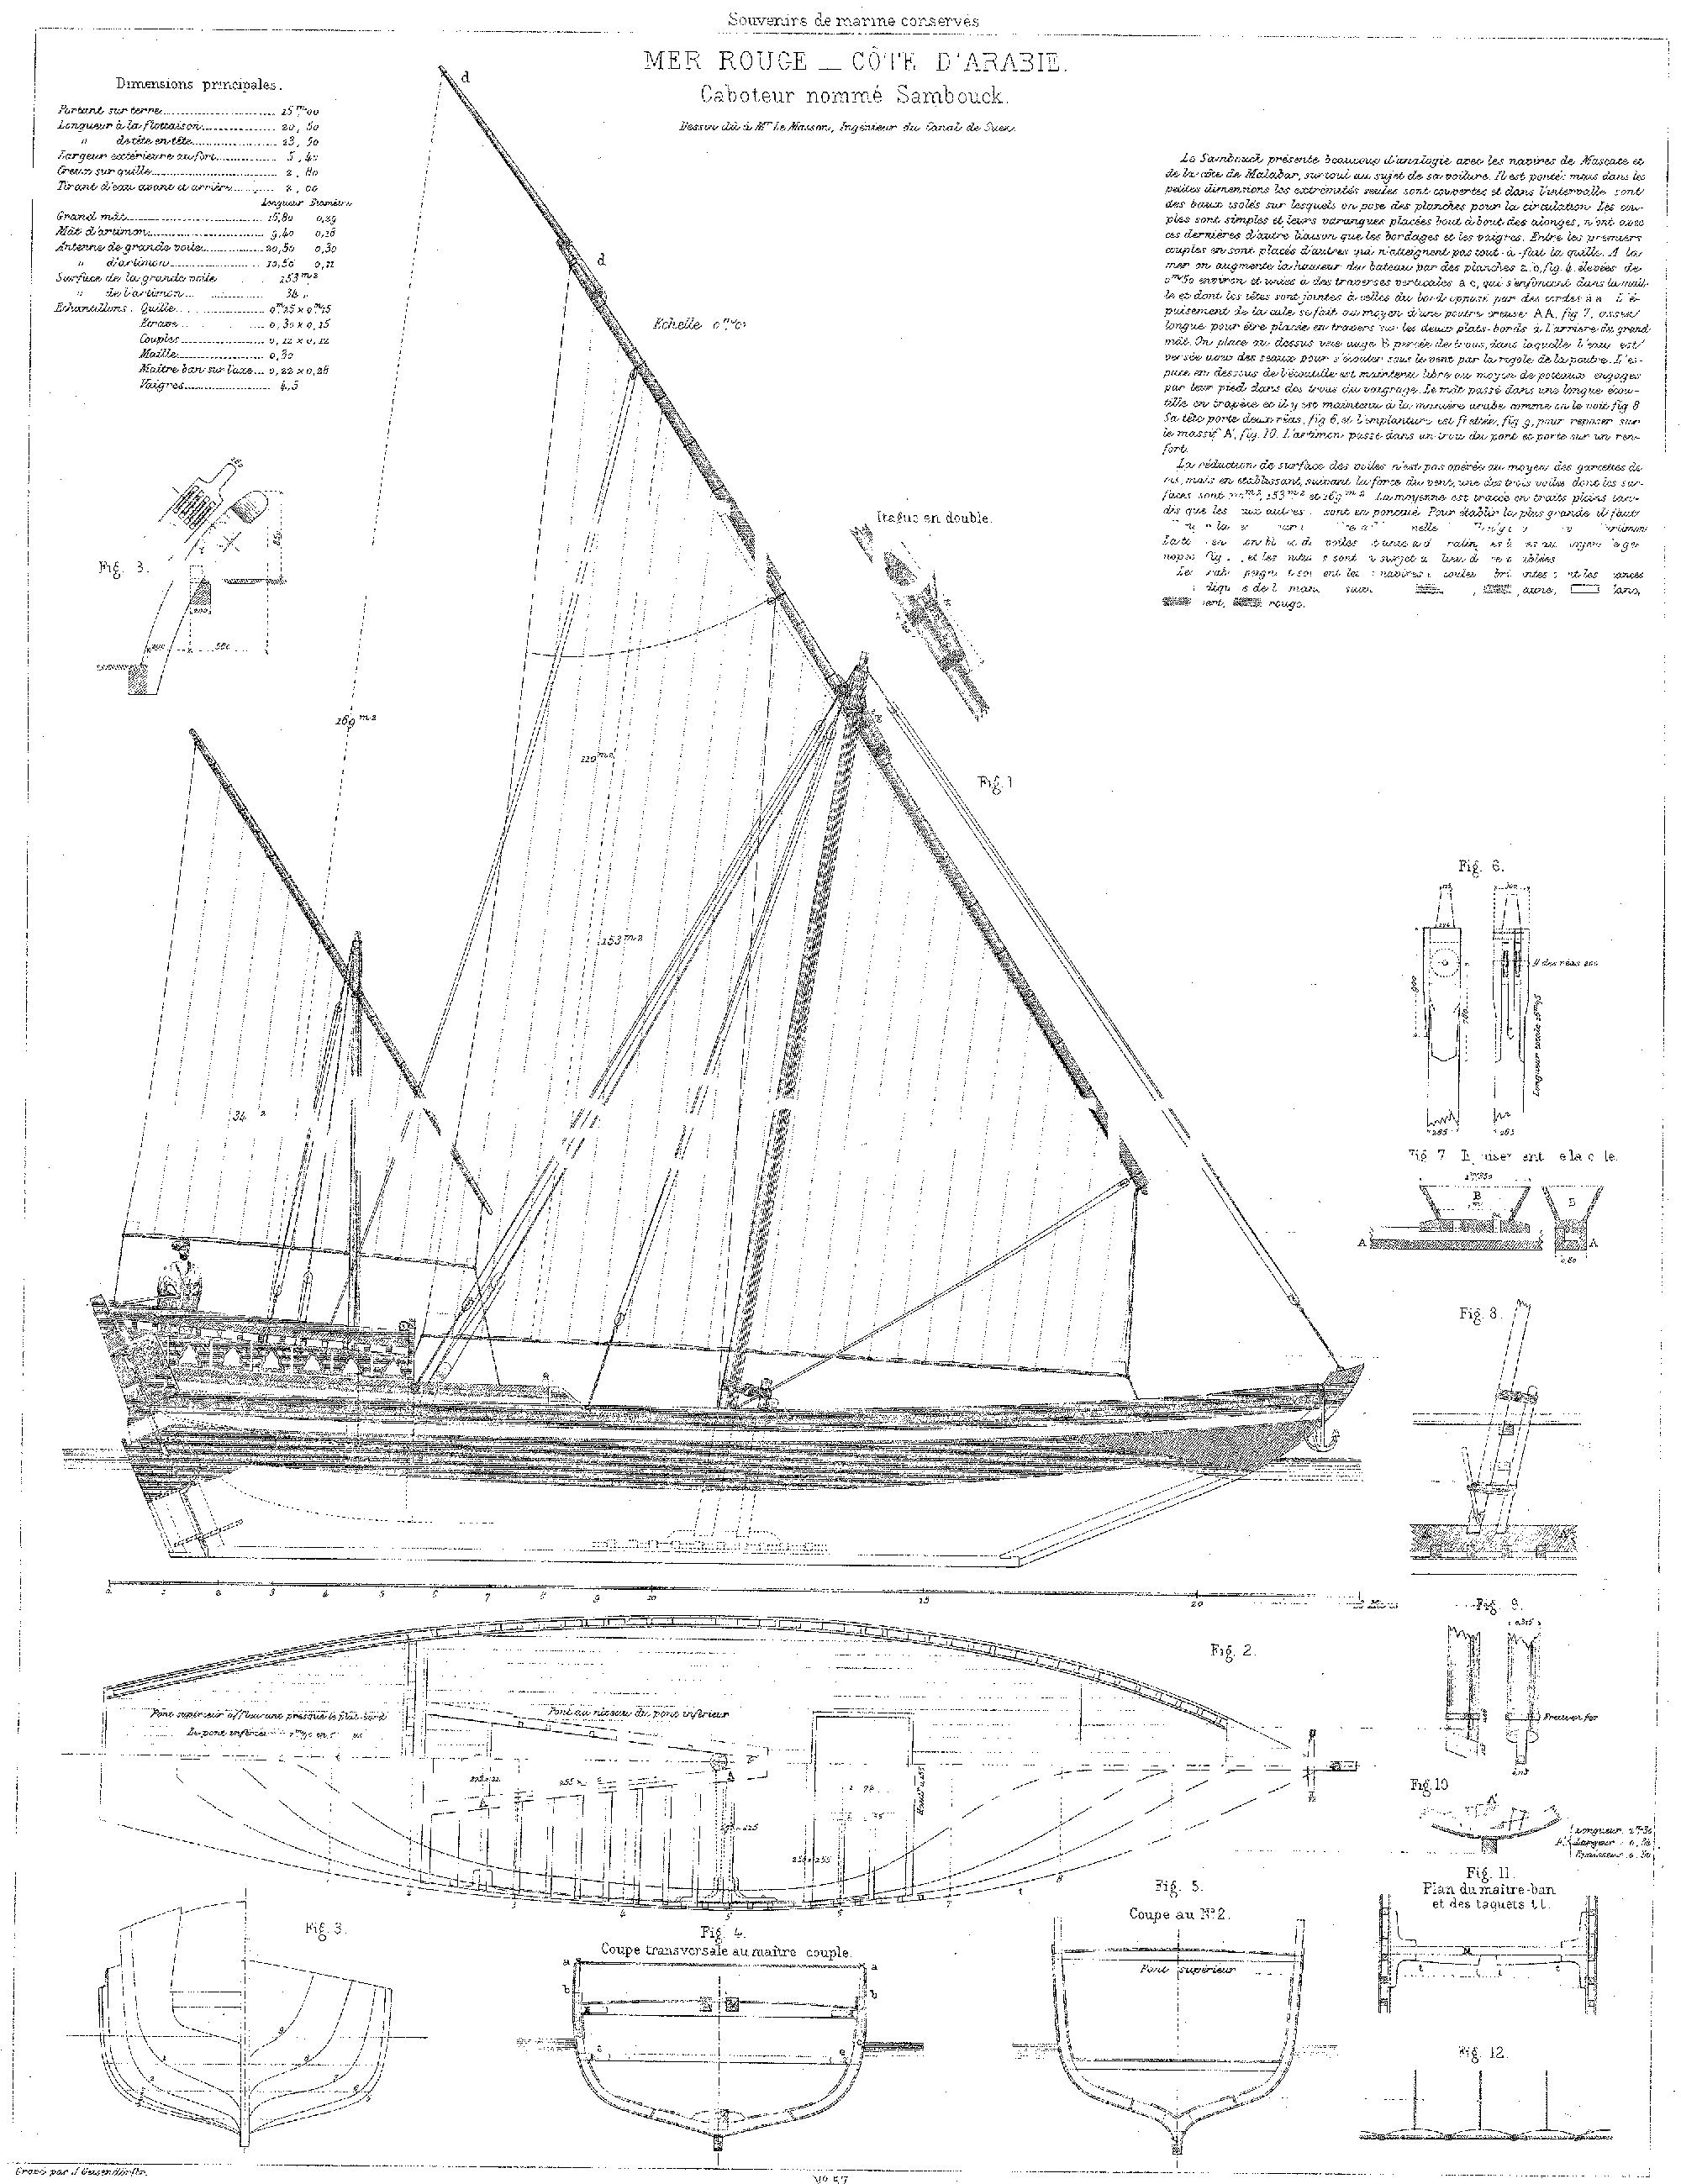
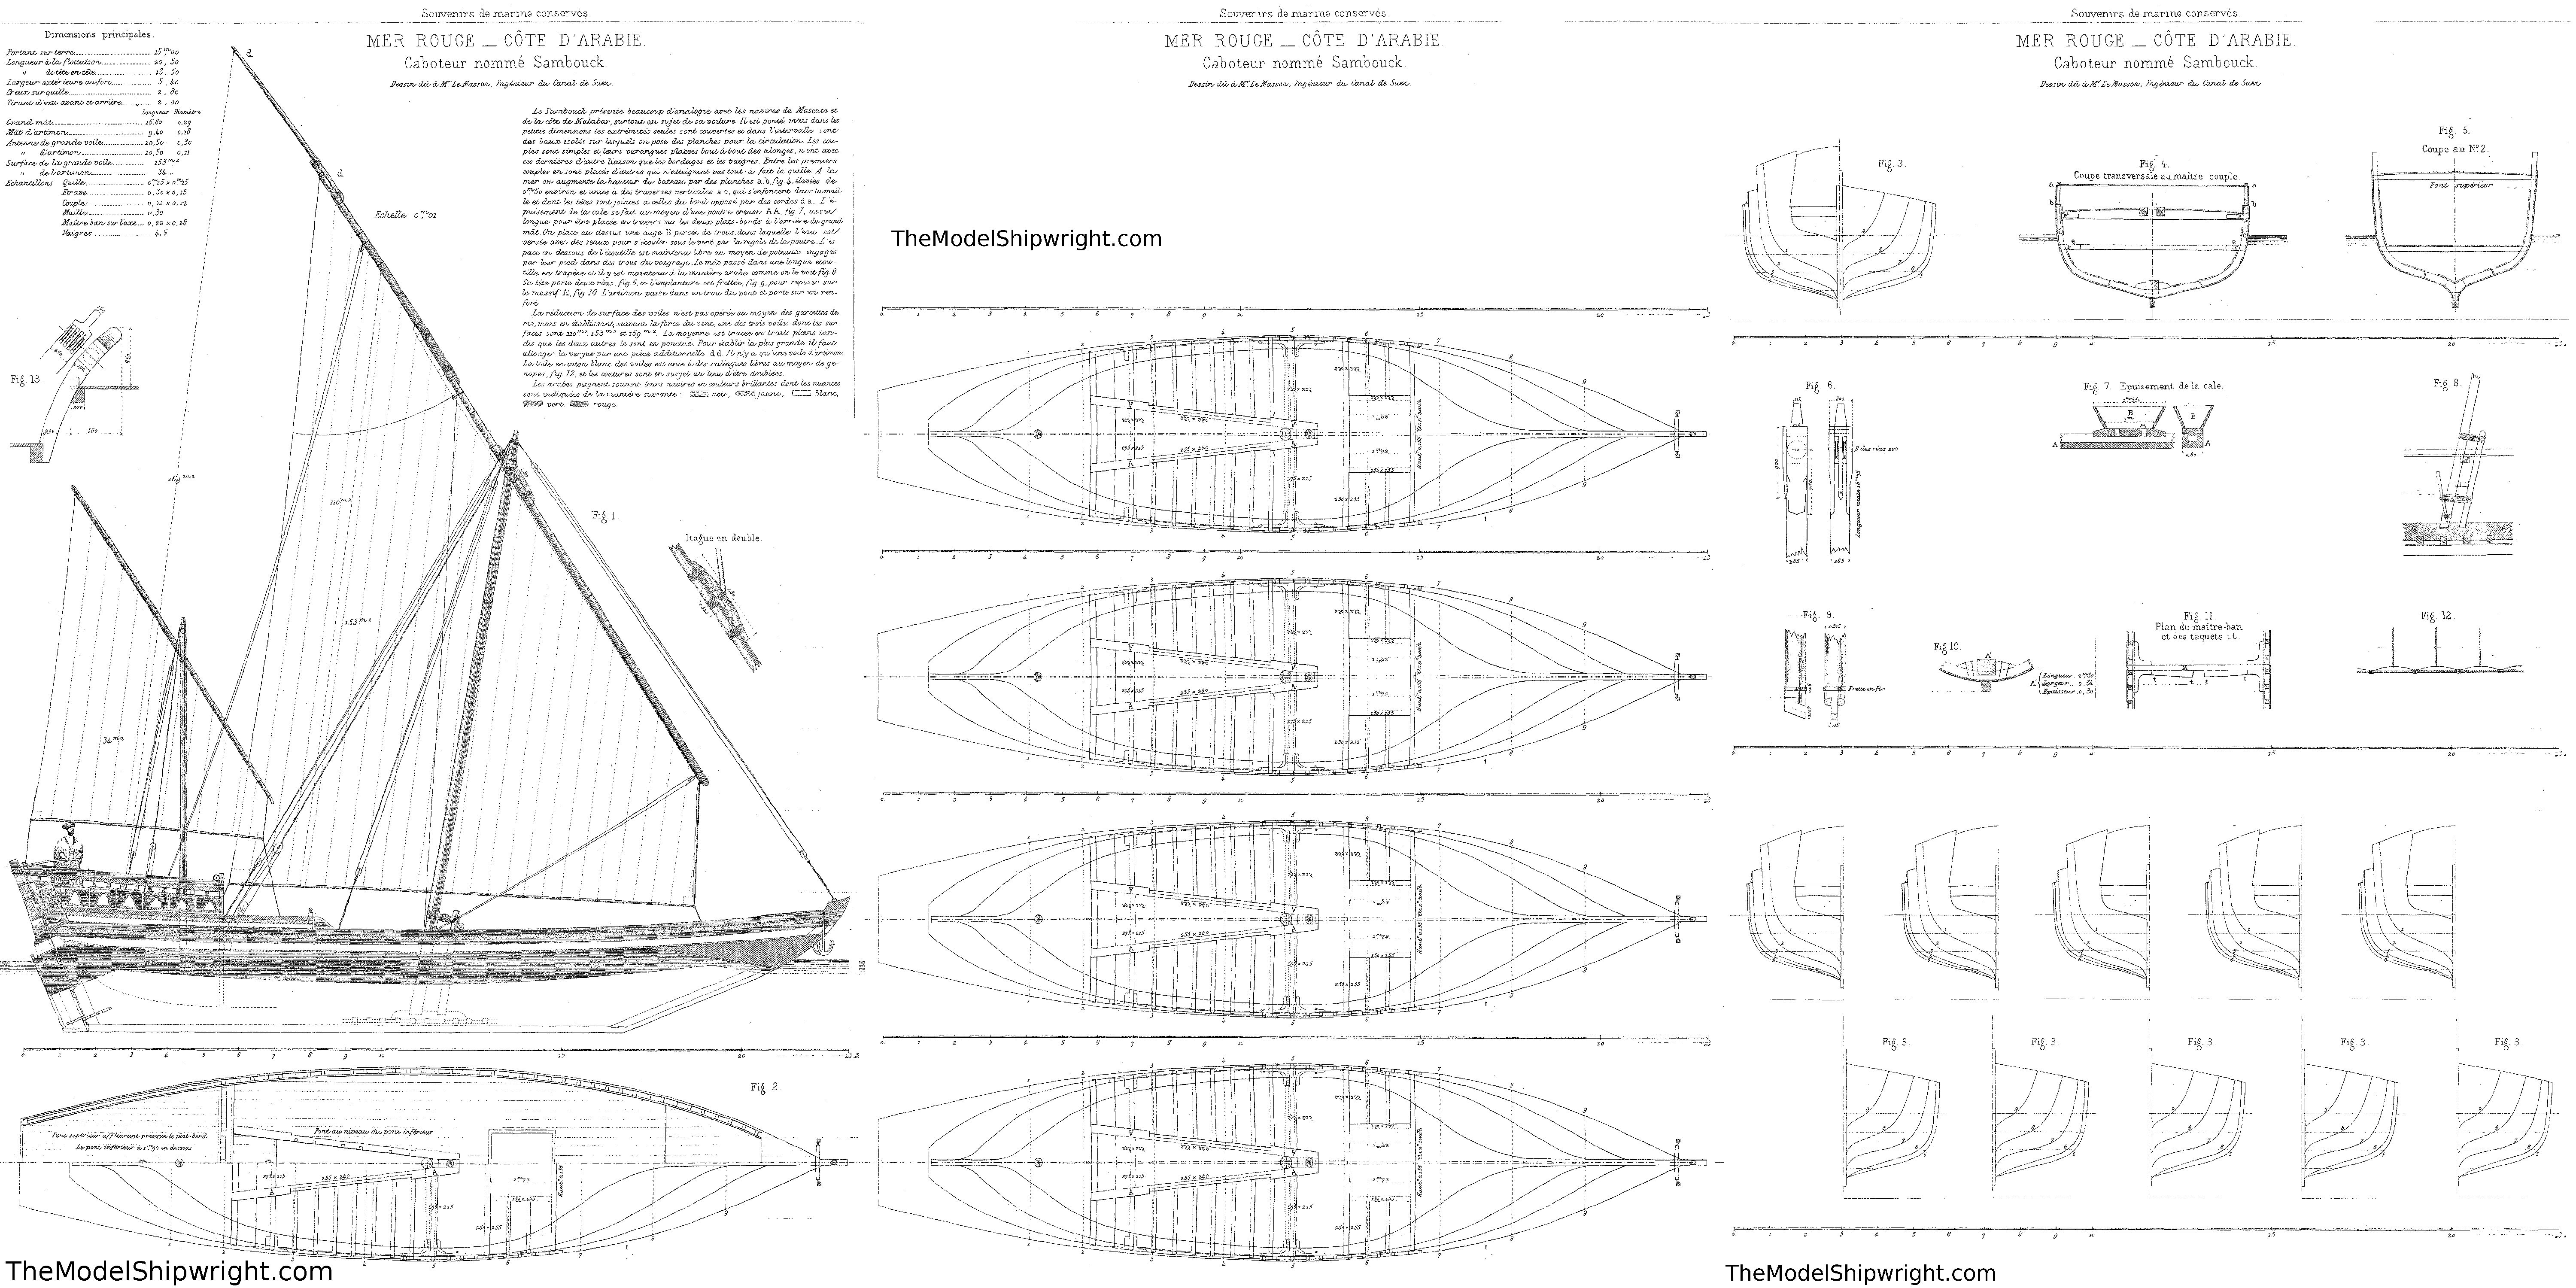
On page 1 of Building a Bread-and-Butter Solid Hull Ship Model, I described how to prepare the planks – called “lifts” by ship modelers – for a model of the Sambouk illustrated on plate 57 from French admiral François-Edmond Pâris’s work “Souvenirs de marine.”* We cut out the waterlines from the half-breadth plan, glued them to the planks, and created reference lines to align the planks when they are stacked up.
On page 2 of Building a Bread-and-Butter Solid Hull Ship Model, I showed how to use dowels to keep the lifts aligned, sawed out the lifts to the shape of those waterline patterns we glued to the planks on Page 1, and glued them together. This gave us a rough step-sided hull for our Red Sea dhow.
On page 3 of Building a Bread-and-Butter Solid Hull Ship Model, we used the section plan (sometimes called ‘body plan’) to create templates to use as a guide when shaping the hull to its final shape.
On this page, we will create a template to determine the shape of the stem and stern of the ship, and complete the last few steps needed before shaped our step-sided hull.
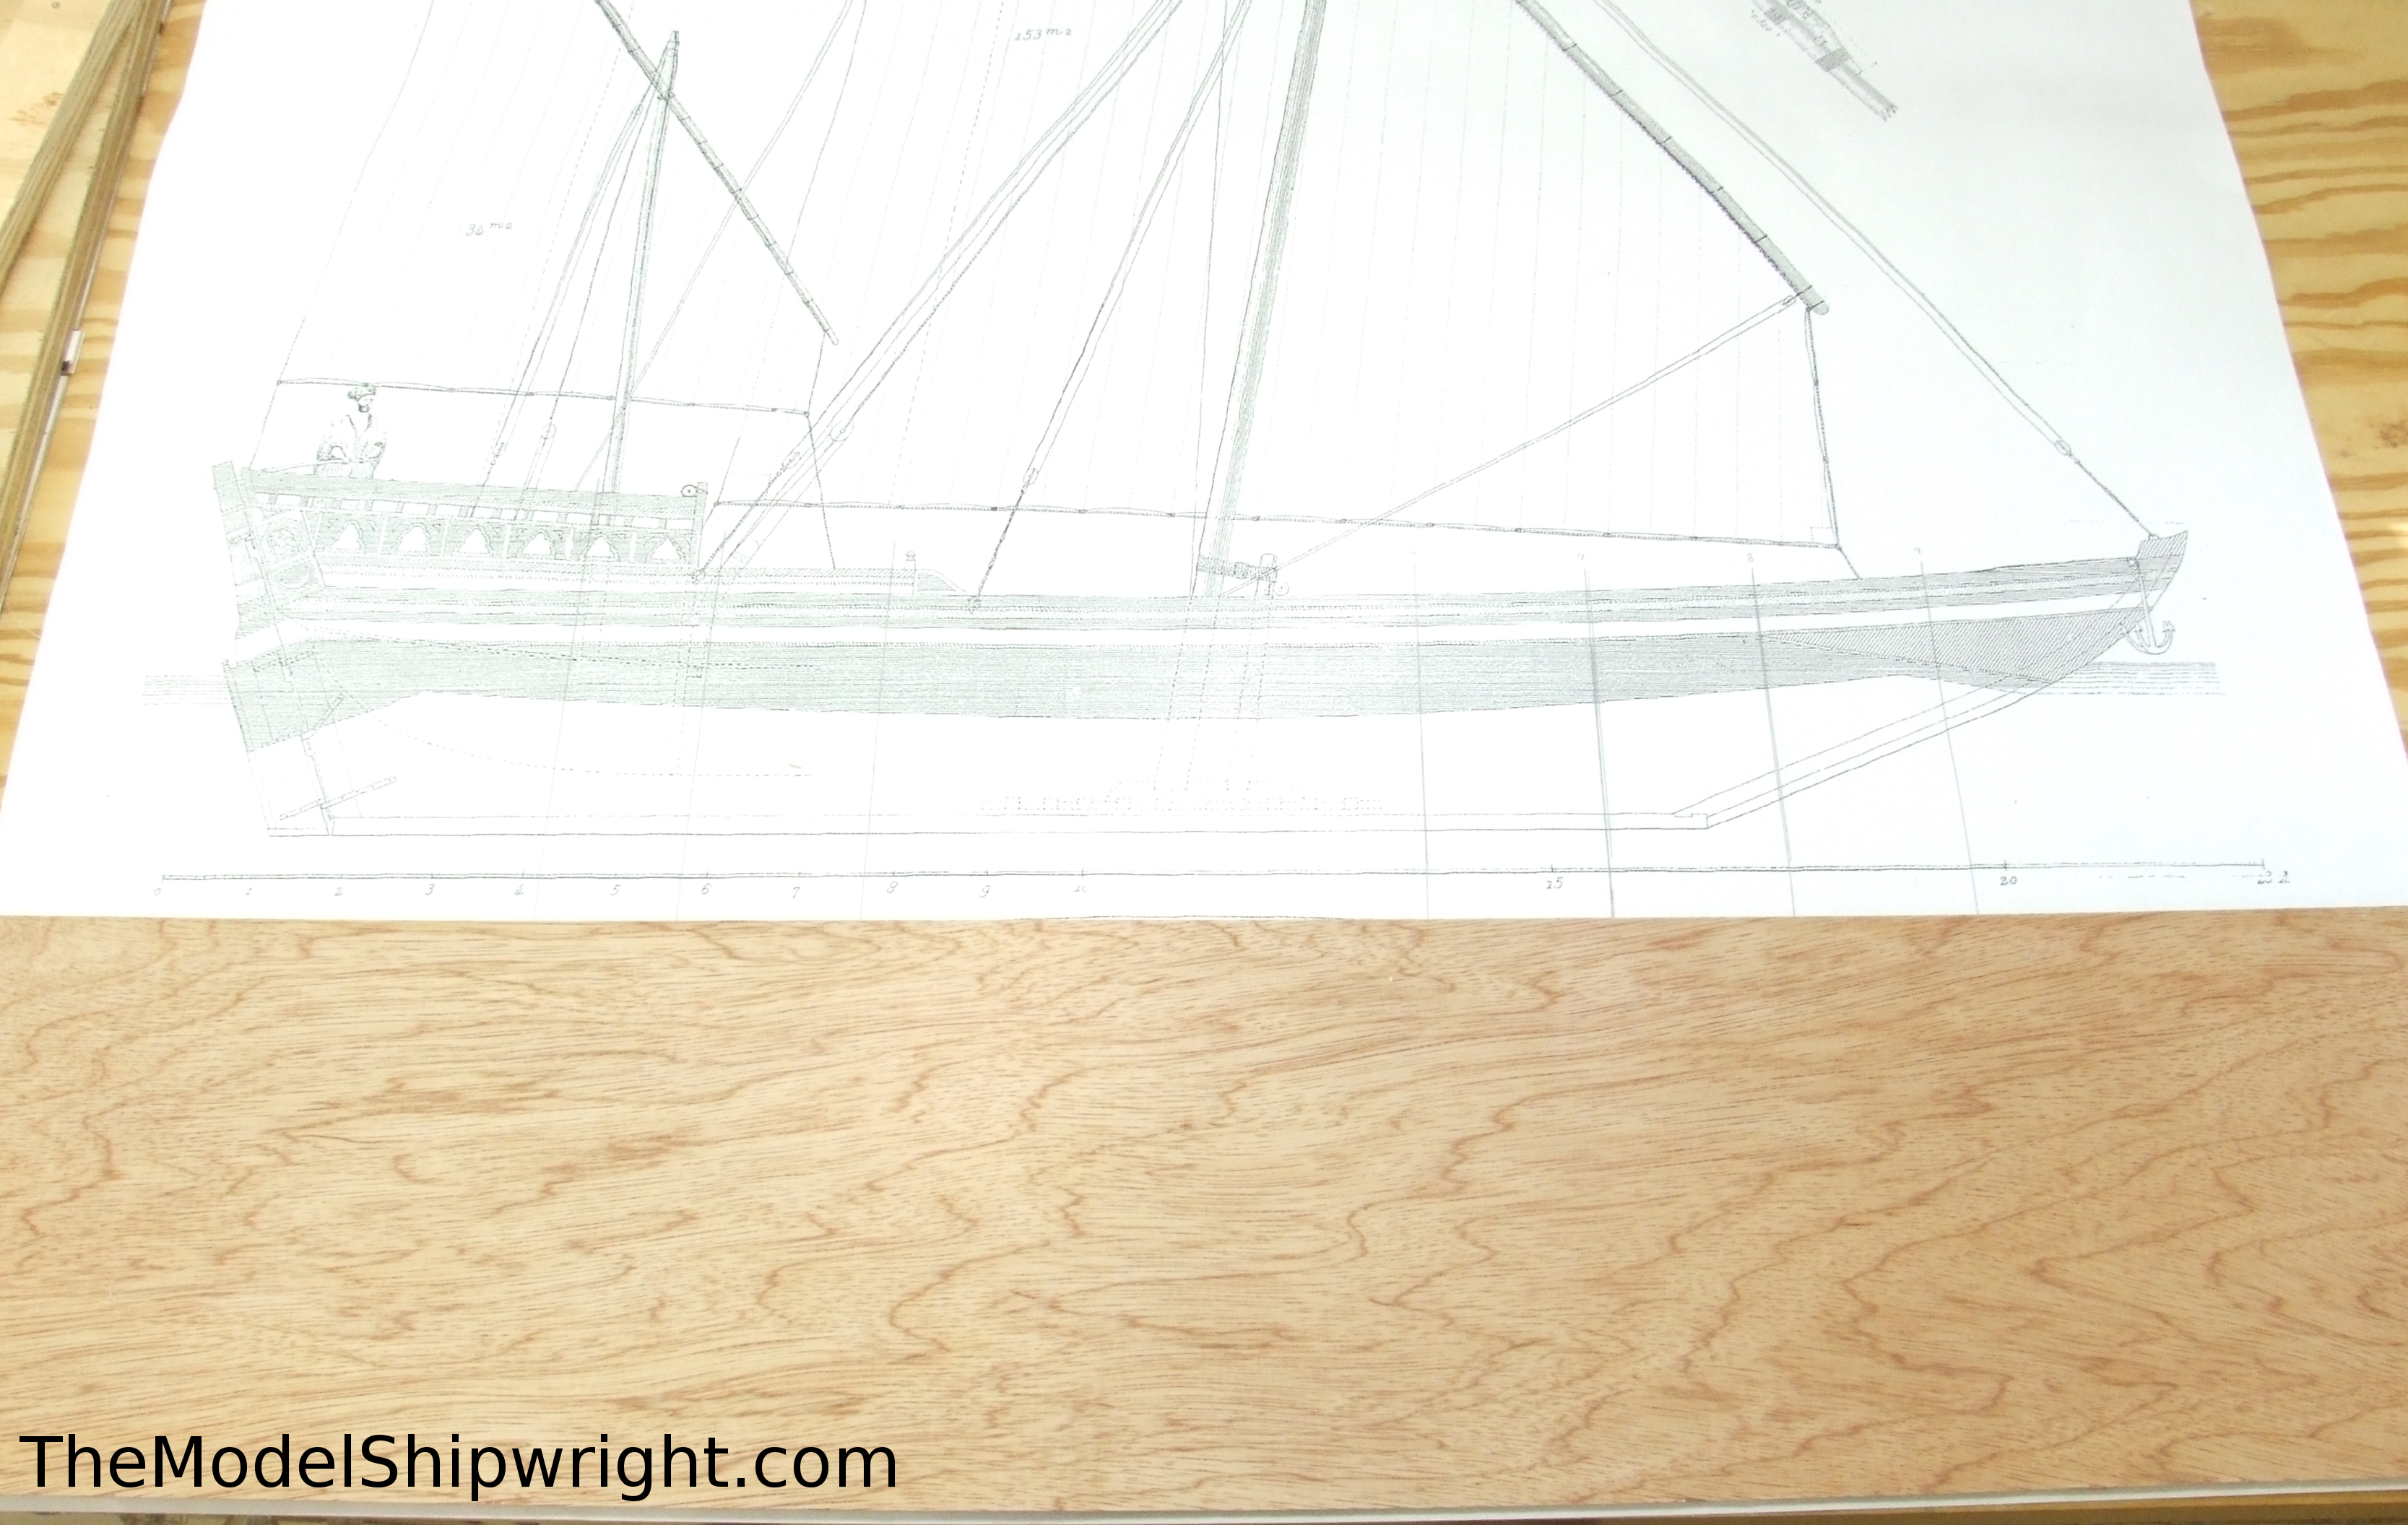
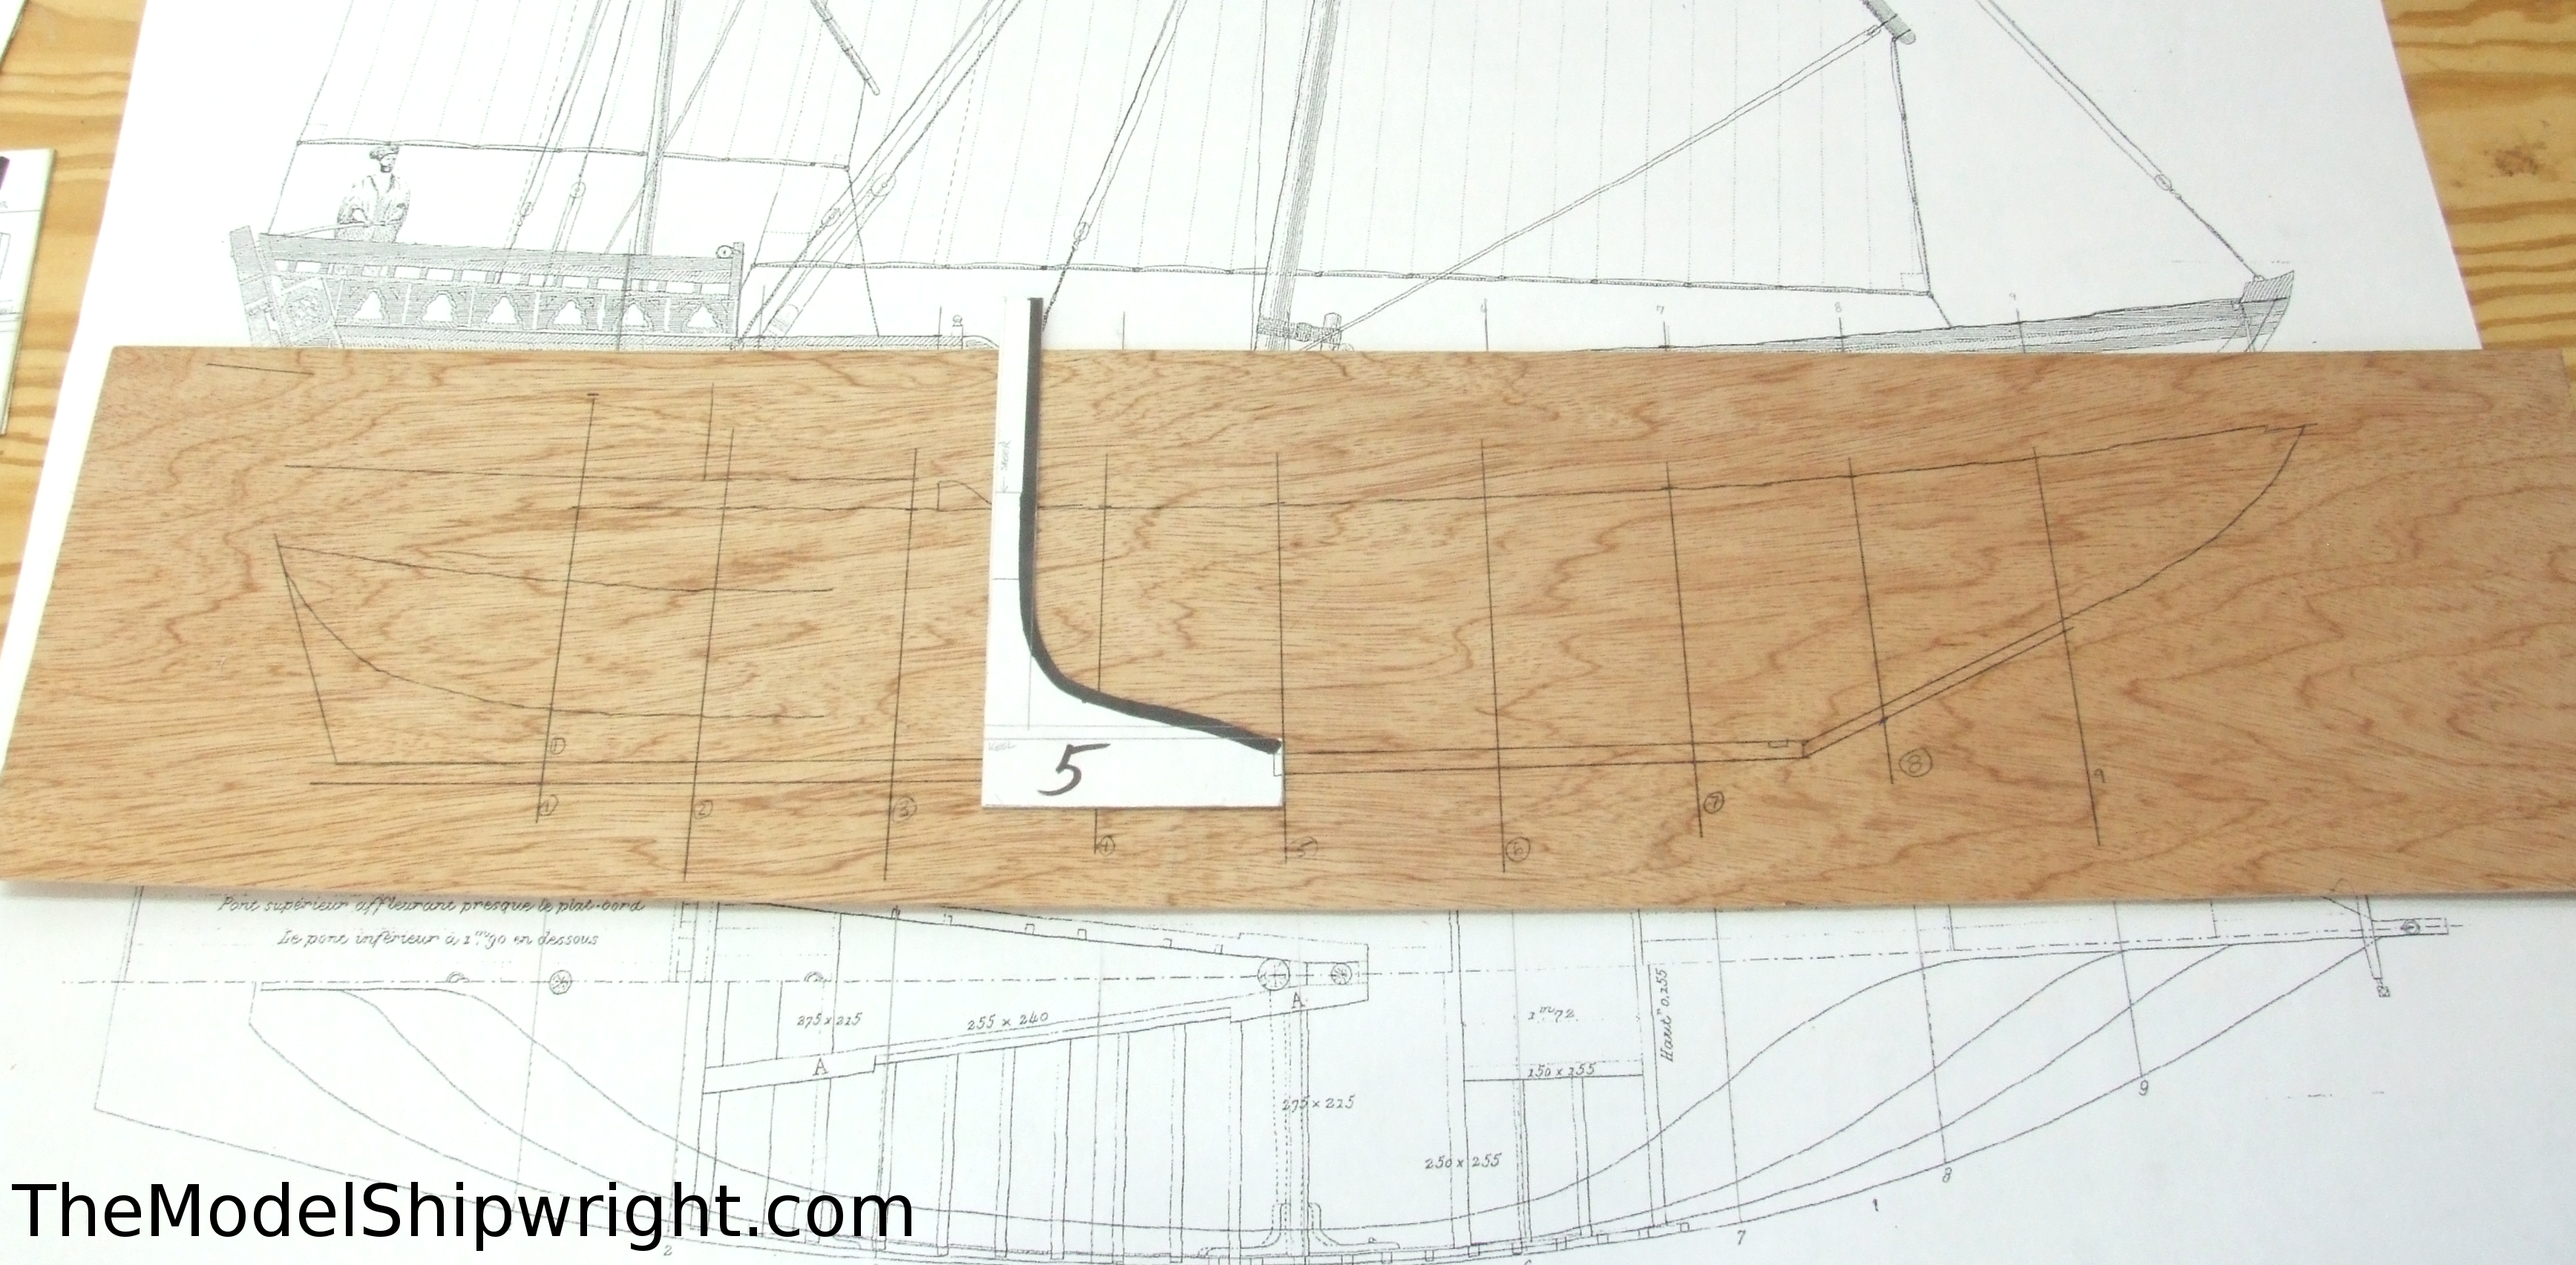
While I was able to cut out the multiple copies of the section plan and glue them right to the plywood to create our section templates, I only had one printed copy of the outboard profile plan, and I wanted to keep that plan in one piece to use as a reference later. So I needed to find a way to transfer the shape of the stem and stern from that plan, at the top of Figure 36,to the piece of 7mm plywood at the bottom of that photo.

There are many ways to accomplish this, but I went with the easiest, old-school way I knew: Carbon paper, in Figure 37.
I don’t even know if you can still buy carbon paper in modern office supply stores, but I have a stash of it left from my early days in journalism. For those who are unfamiliar with it, back before the days of photocopiers and computer printers, we typed our stories on actual typewriters. Carbon paper is literally what the name implies: Paper with a layer of carbon on one side. When more than one editor wanted to see the story we were writing, we put a piece of carbon paper between two sheets of paper before putting them in the typewriter, and when you typed, the pressure of the type hammer striking the paper transferred carbon in the shape of the letter you typed to the bottom piece of paper (the type hammer struck an inked ribbon to print the letter on the top piece of paper).
This is the origin of the term “CC:” that modern email programs use to indicate who, other than the main recipient, will receive a copy of the message. It is the abbreviation used to note who was receiving the “carbon copy” of the original.
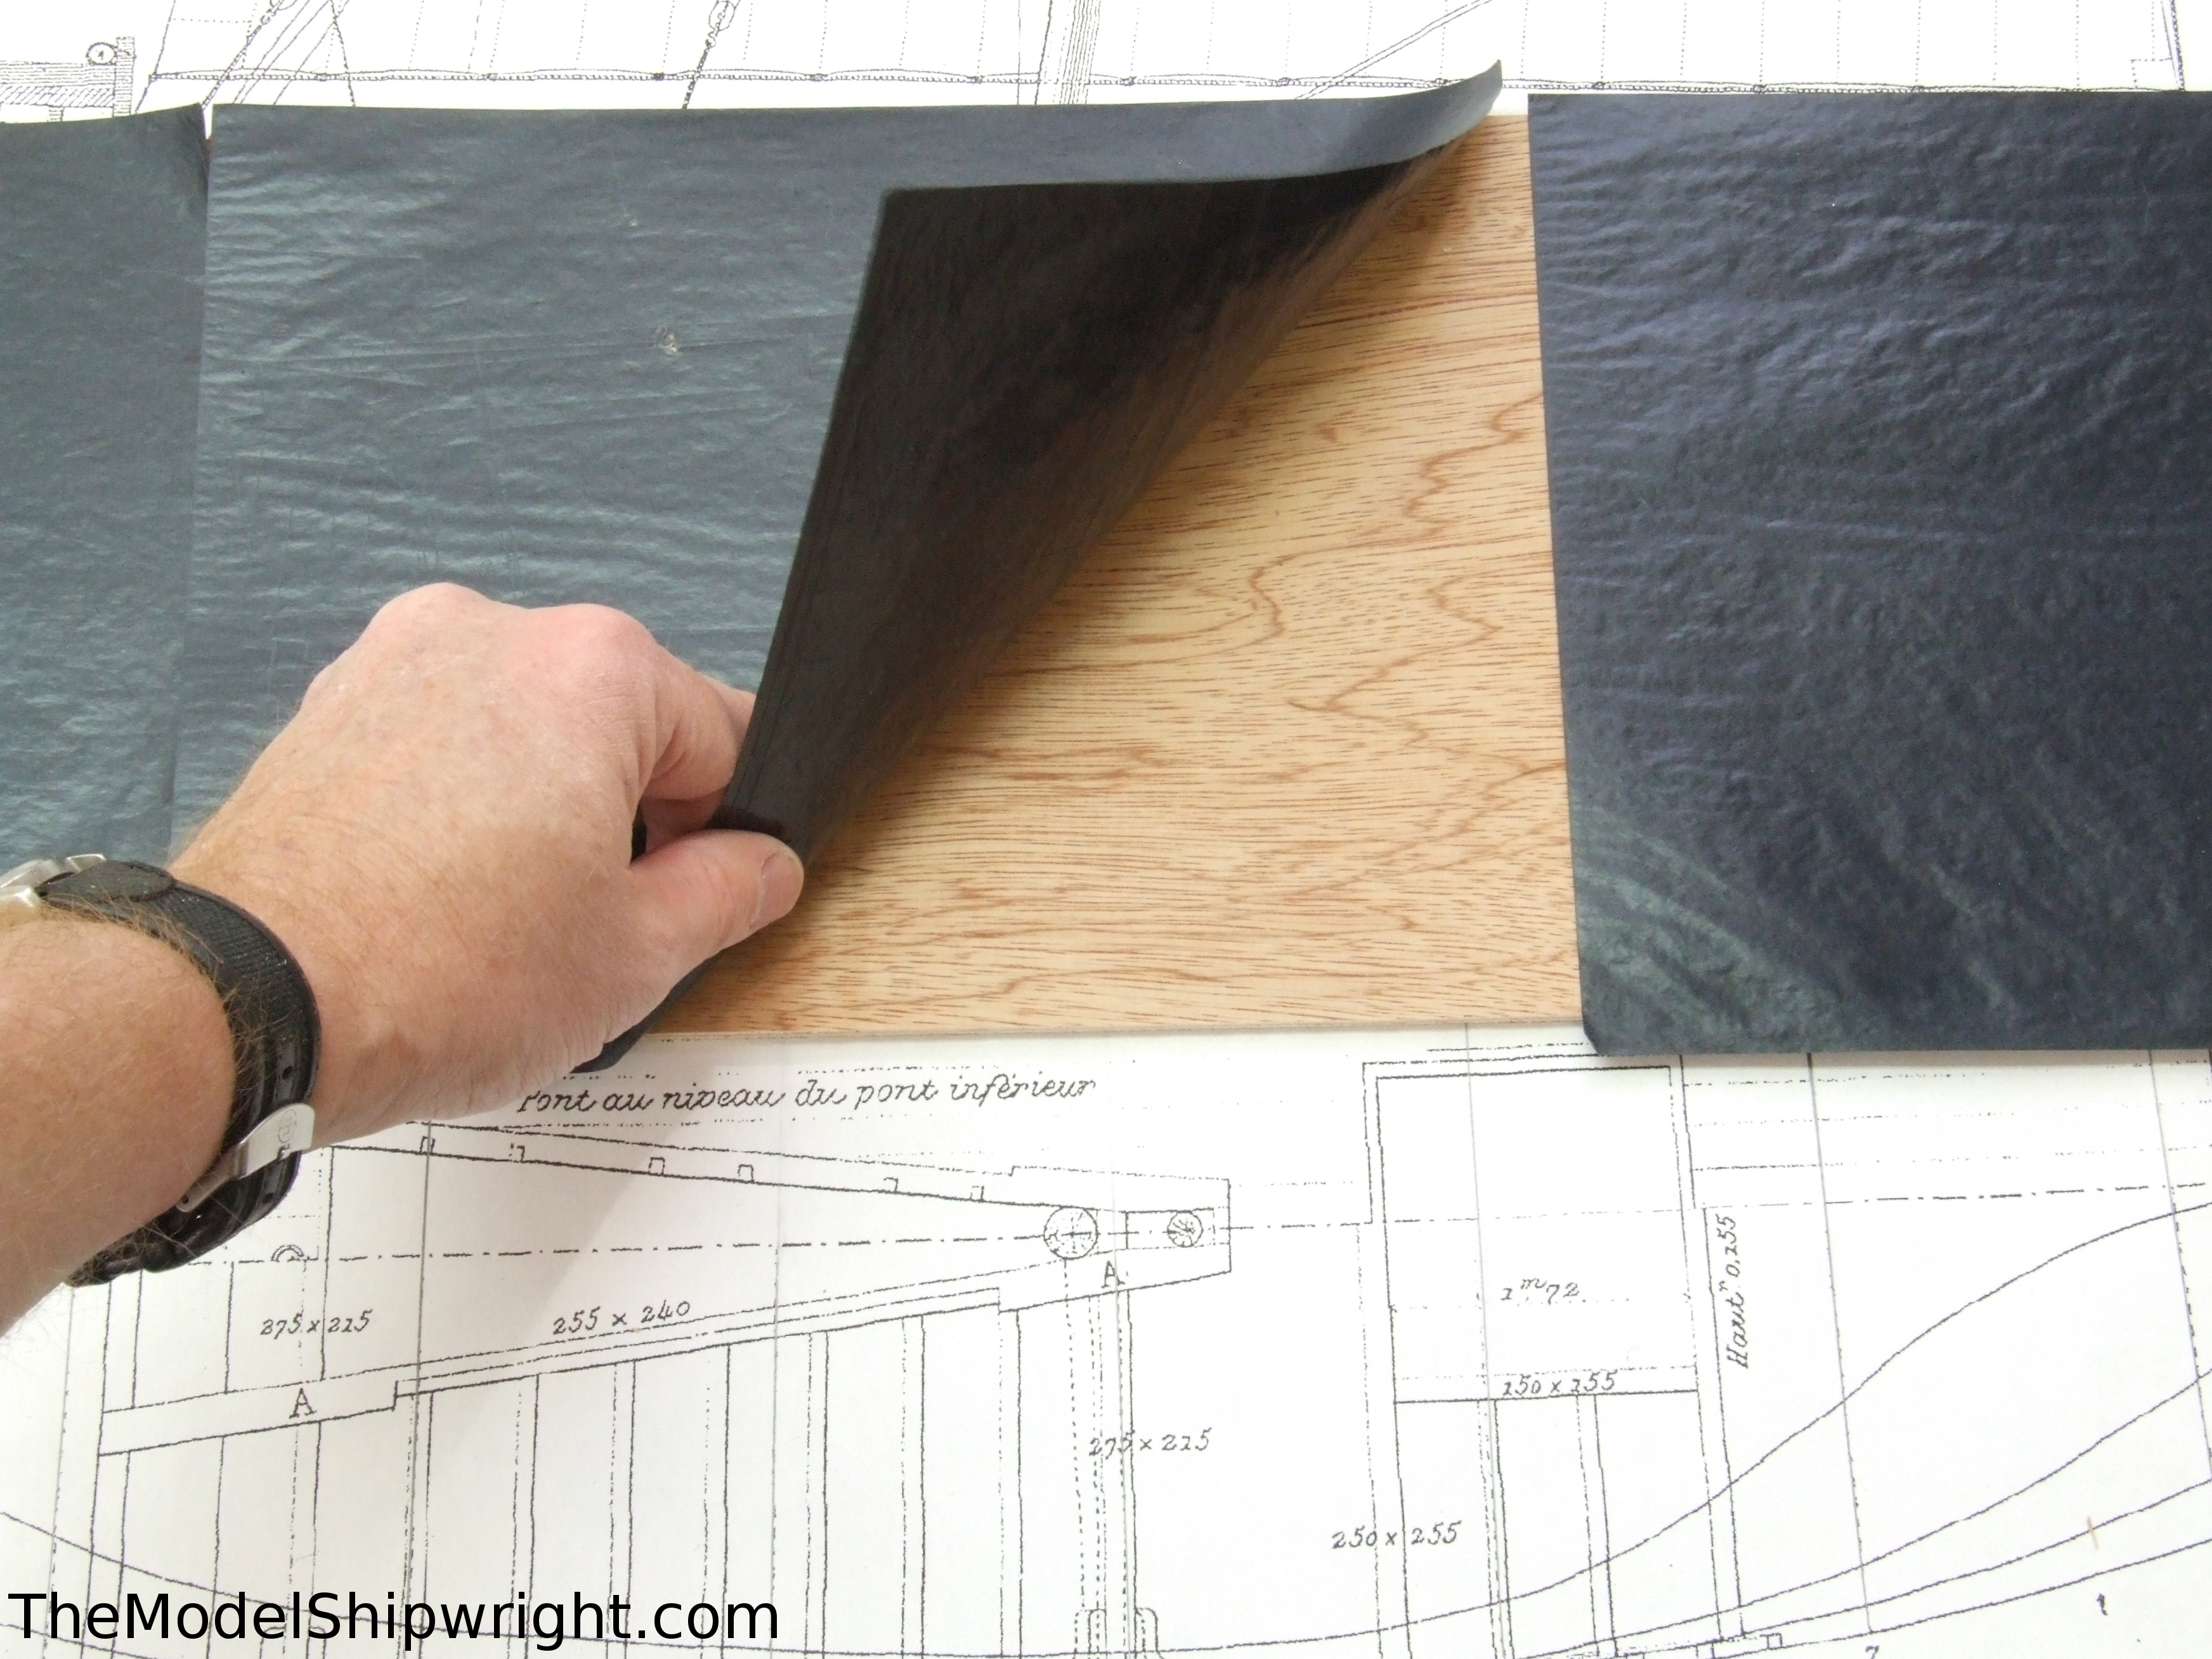
So, while obsolete, carbon paper is still a quick and easy way to transfer a drawing to another surface. Simply lay the carbon paper on the plywood as shown in Figure 38 (note one side is shiny and the other more dull – make sure you put the dull side down, as that is the side with the carbon, and if you do it backwards, you will transfer the image to the back of the original plan, instead of the plywood.
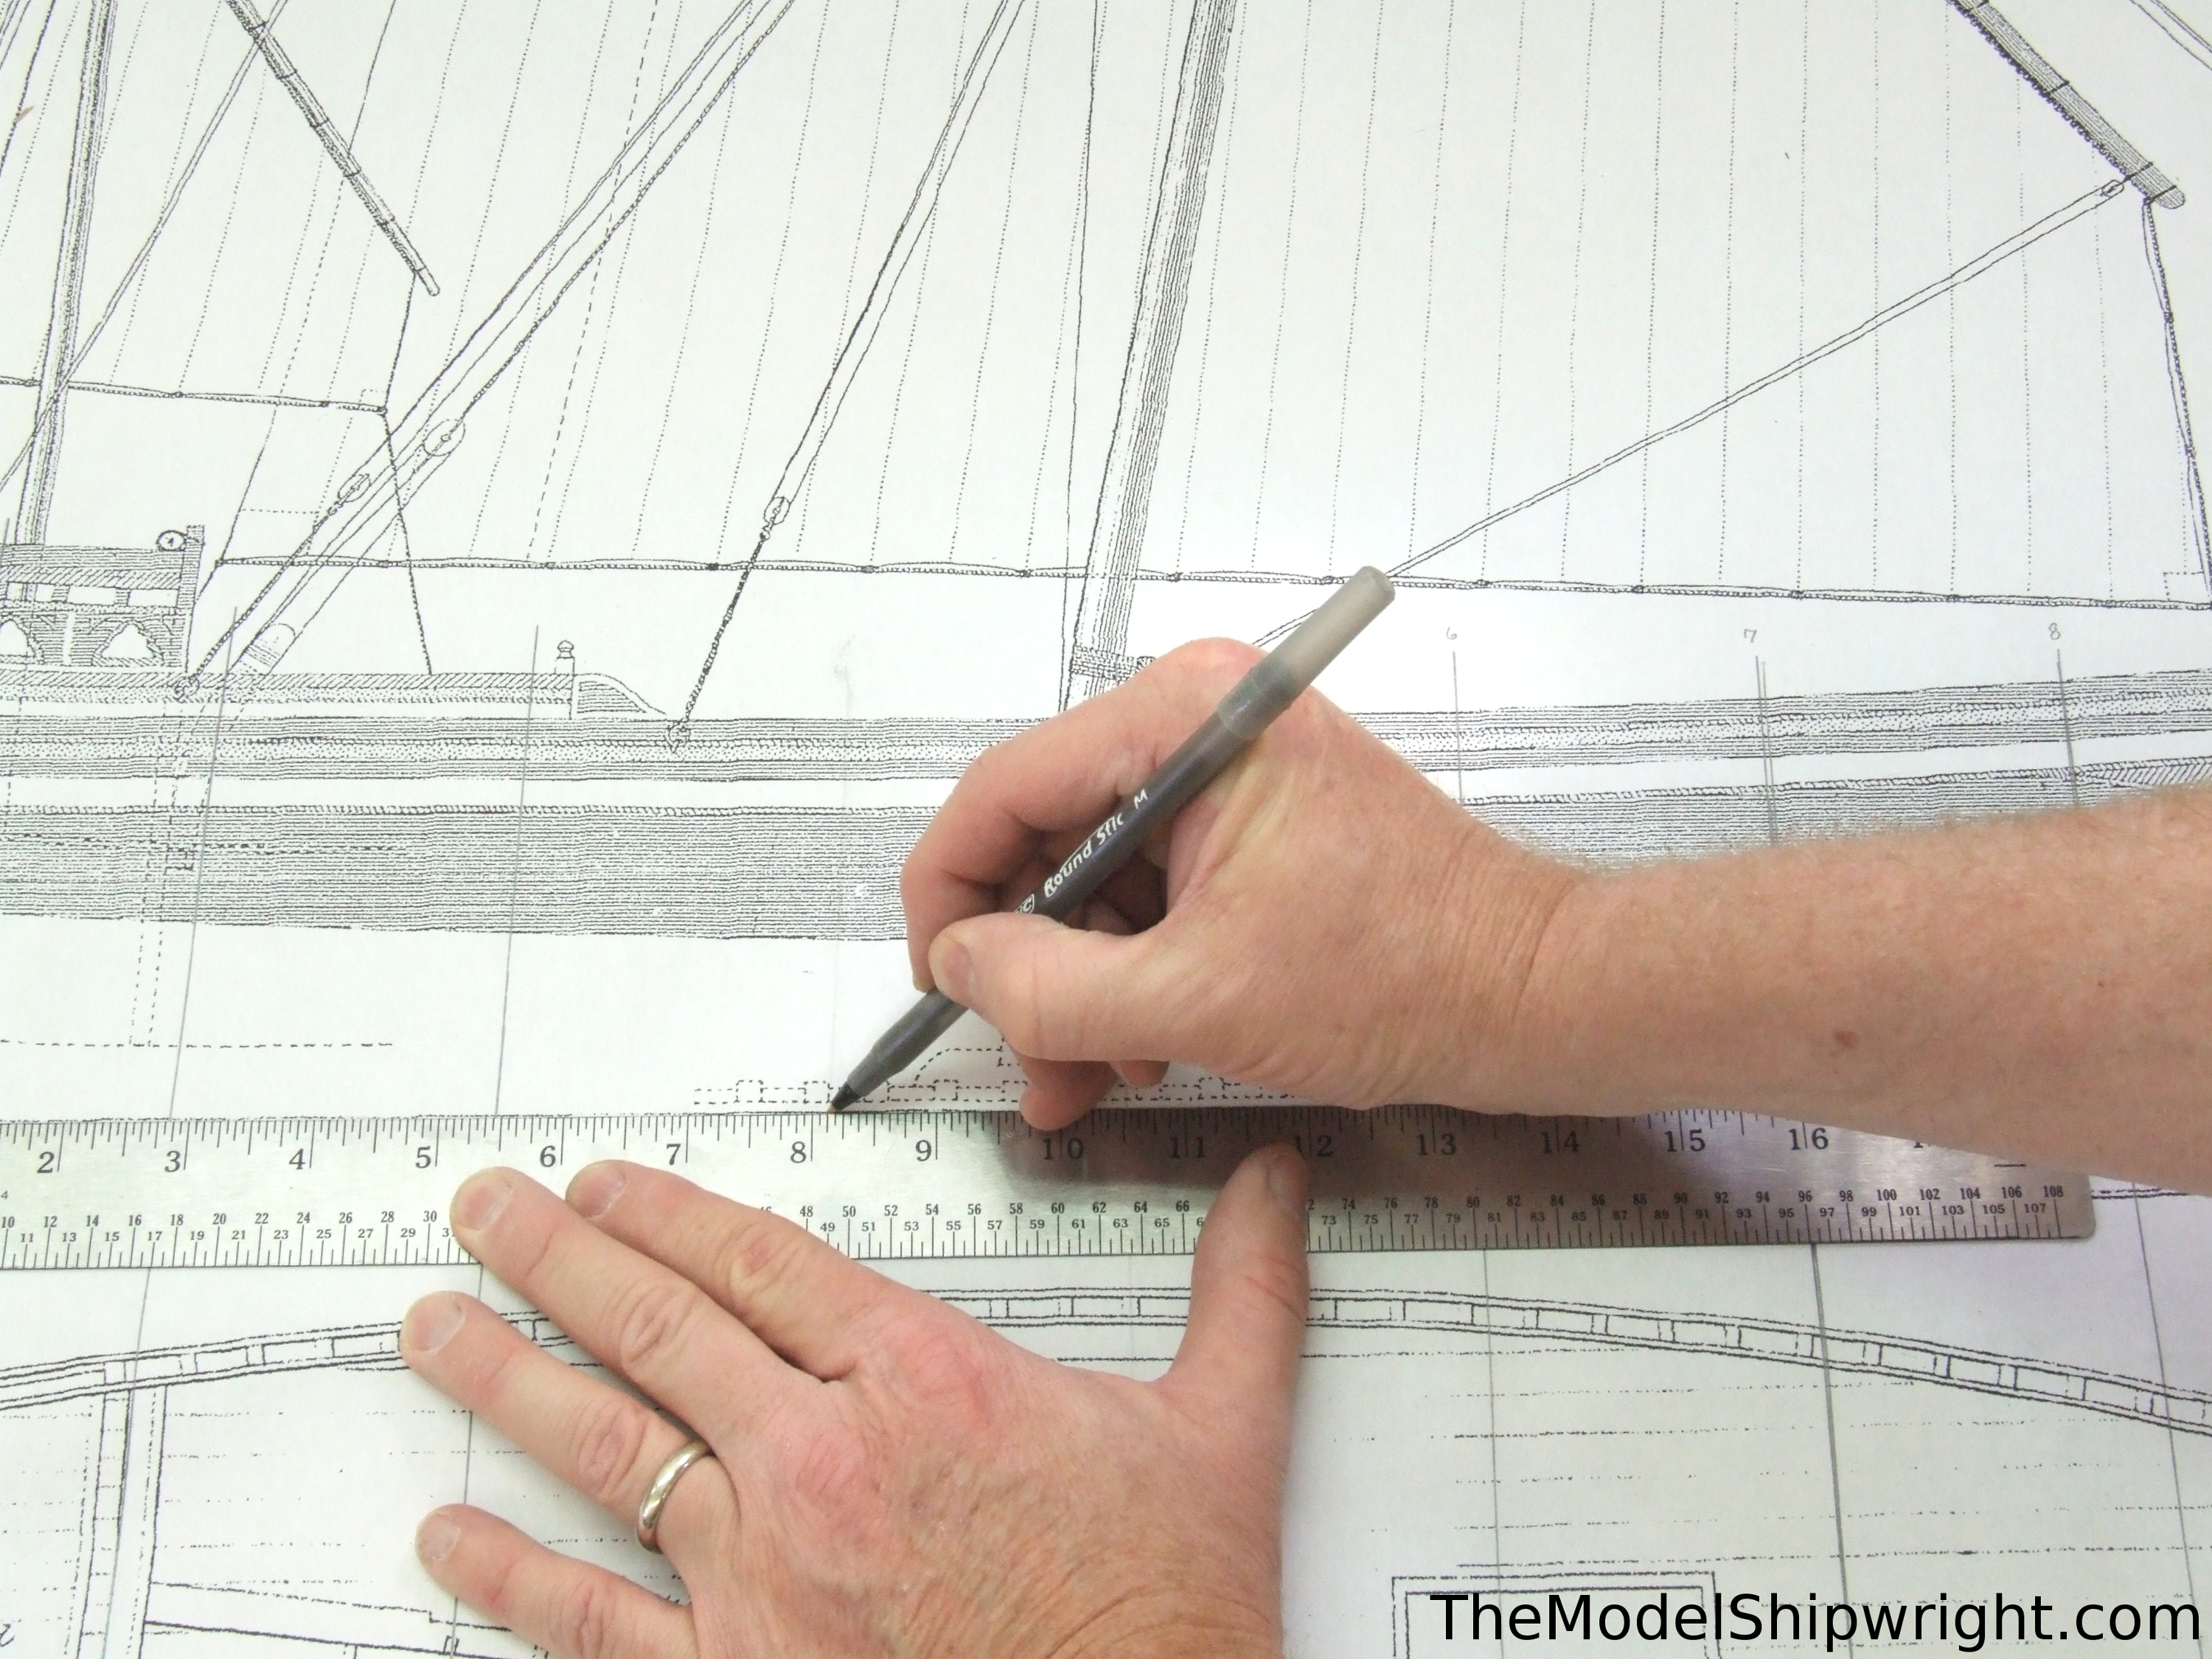
Then lay the plan over the carbon paper-covered plywood, and as shown in Figure 39, trace the lines from the original plan. Some people suggest using a stylus that leaves no marks on the original plan, but I use a ball-point pen because it rolls easy, and you can quickly see if you deviate from the line you are tracing.
Mark the keel, stem, and sternpost, as well as the section lines. Make sure you mark where the hull rises away from the keel toward the stern – the area that will later be filled with “deadwood.” I also marked the sheer and decks where I could just to check my accuracy as shown in Figure 40, using the templates created on page 3.
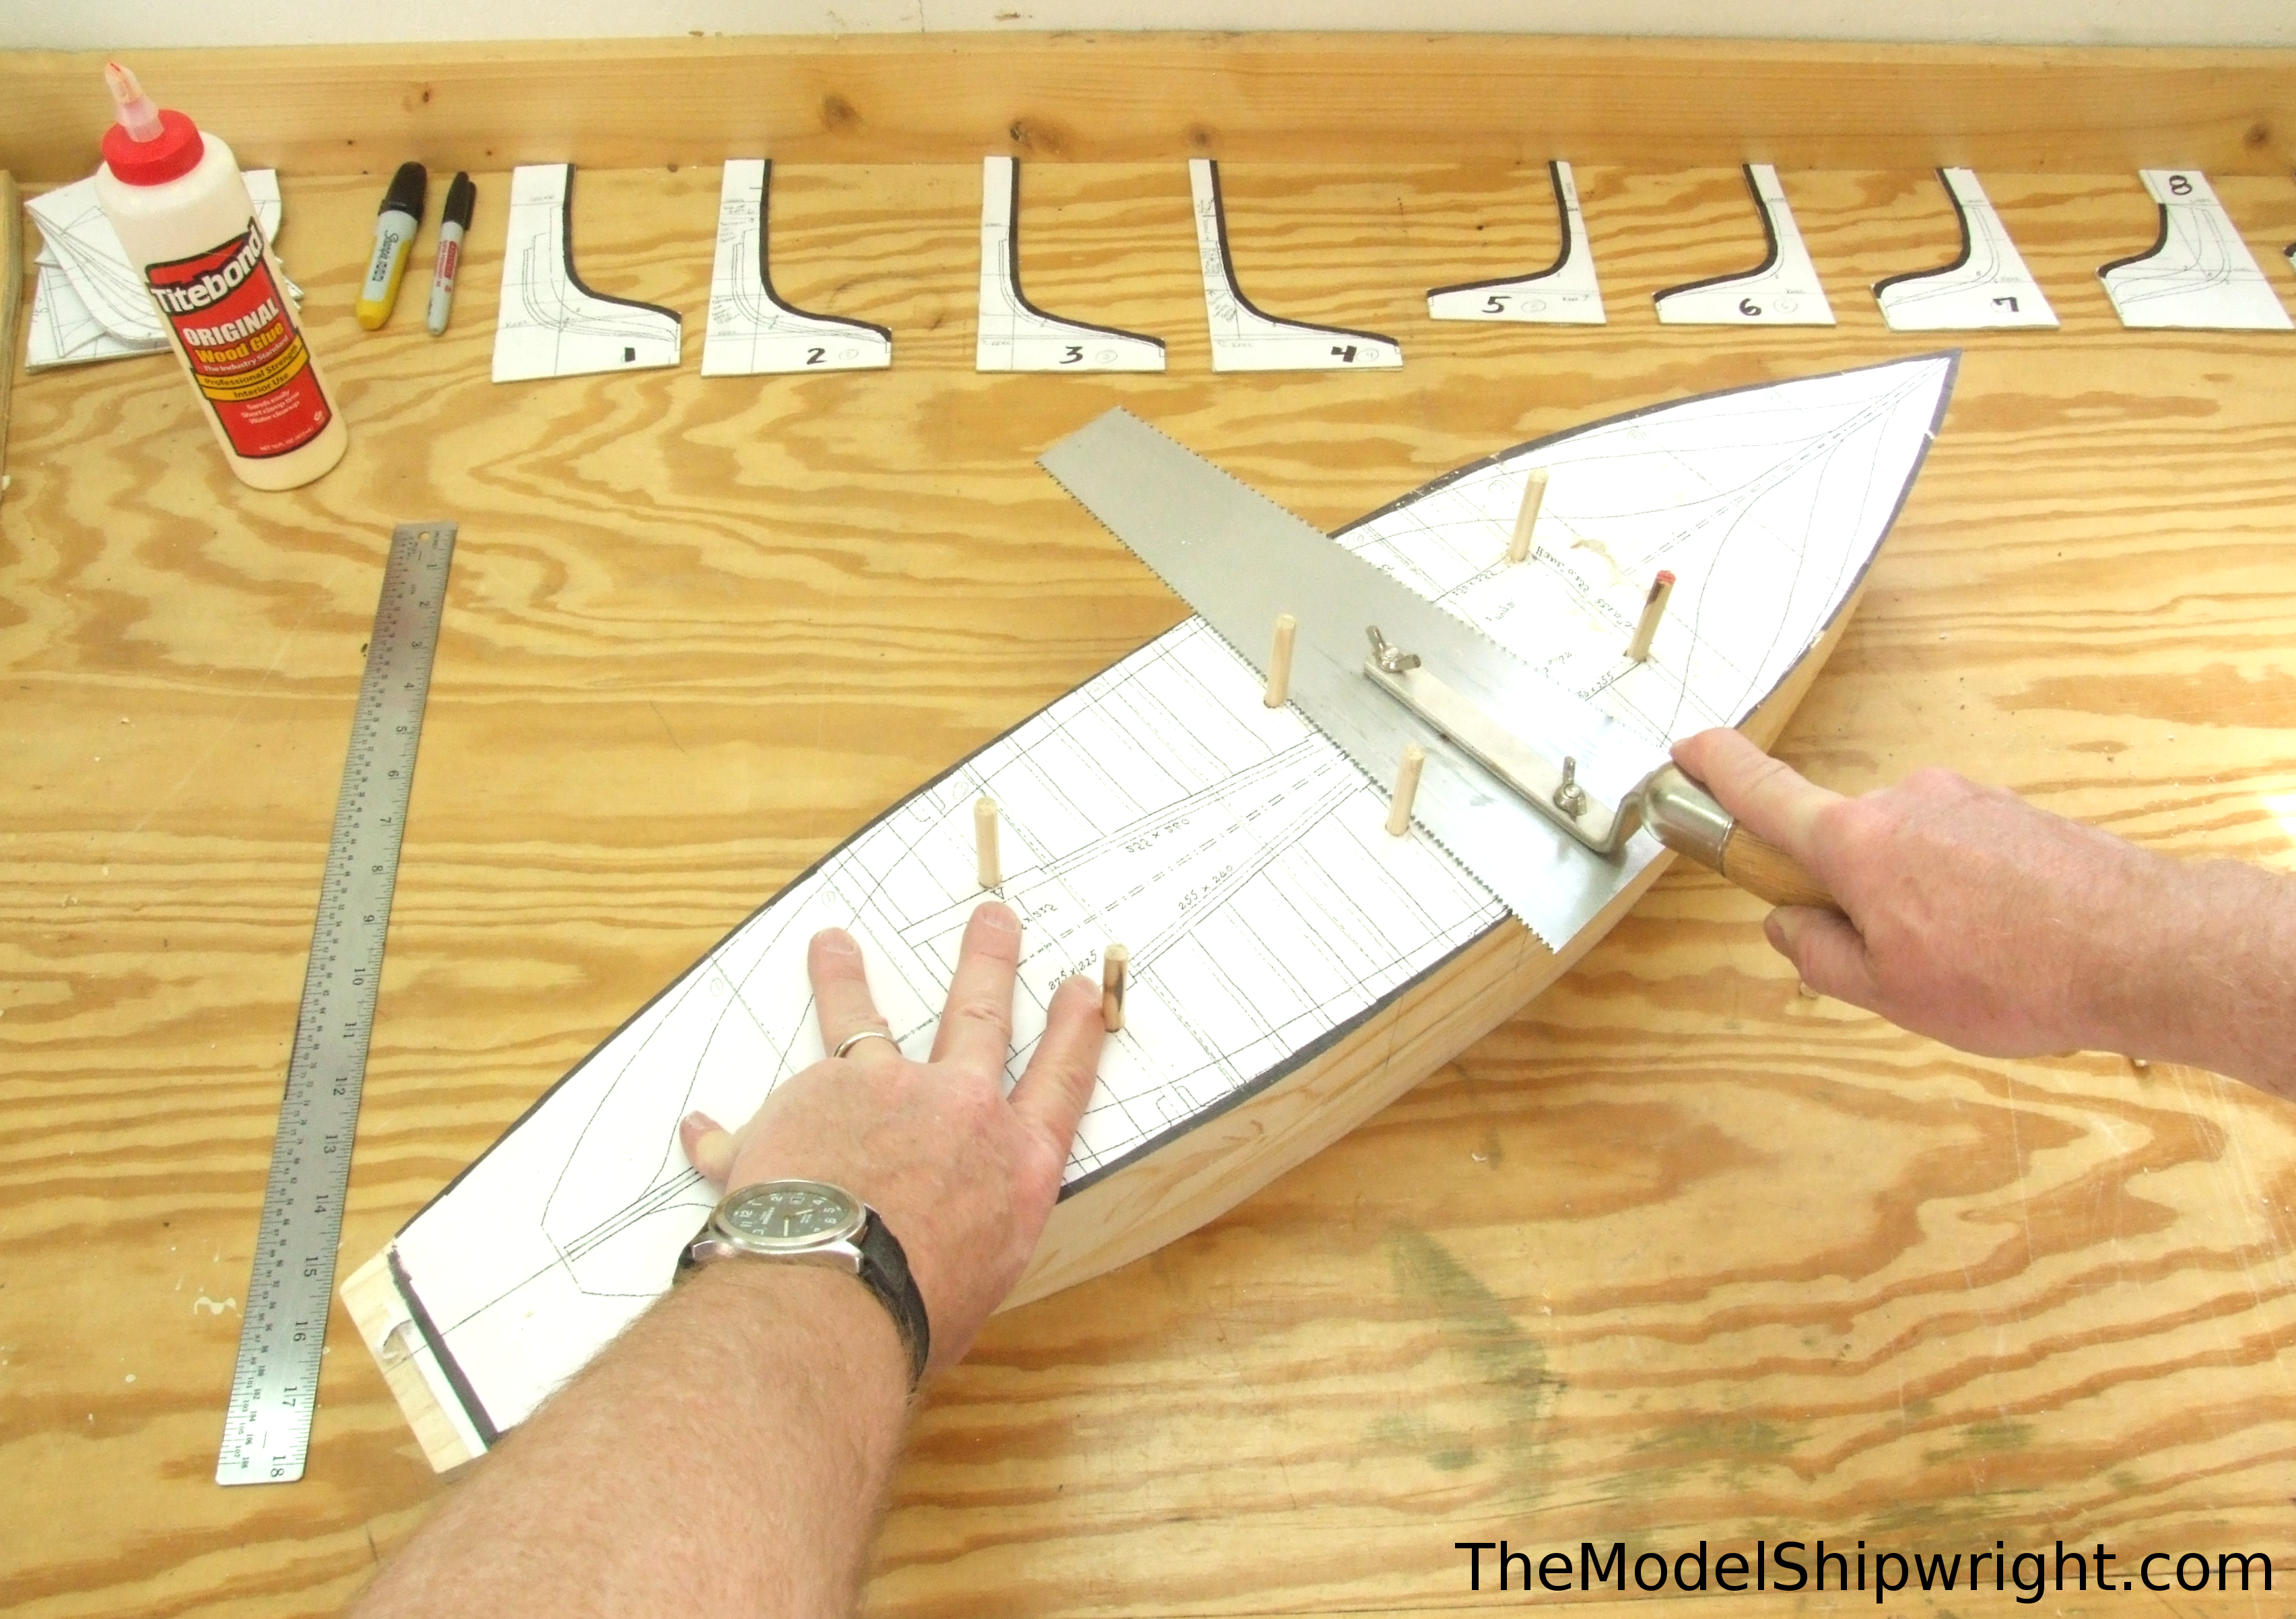
The stem and stern shapes can now be cut out using a scroll saw or keyhole saw. I cut the single template in two, as the stepped hull is longer at first than its finished size, and a one-piece template for both stem and stern will not fit over it.
Next, I cut off the excess length of the dowels protruding from the top of the hull with a flush-cutting saw, as shown in Figure 41. I left these long to assist in aligning the lifts during gluing, but they are no longer needed, and will get in the way of the vise block we will install in just a moment.
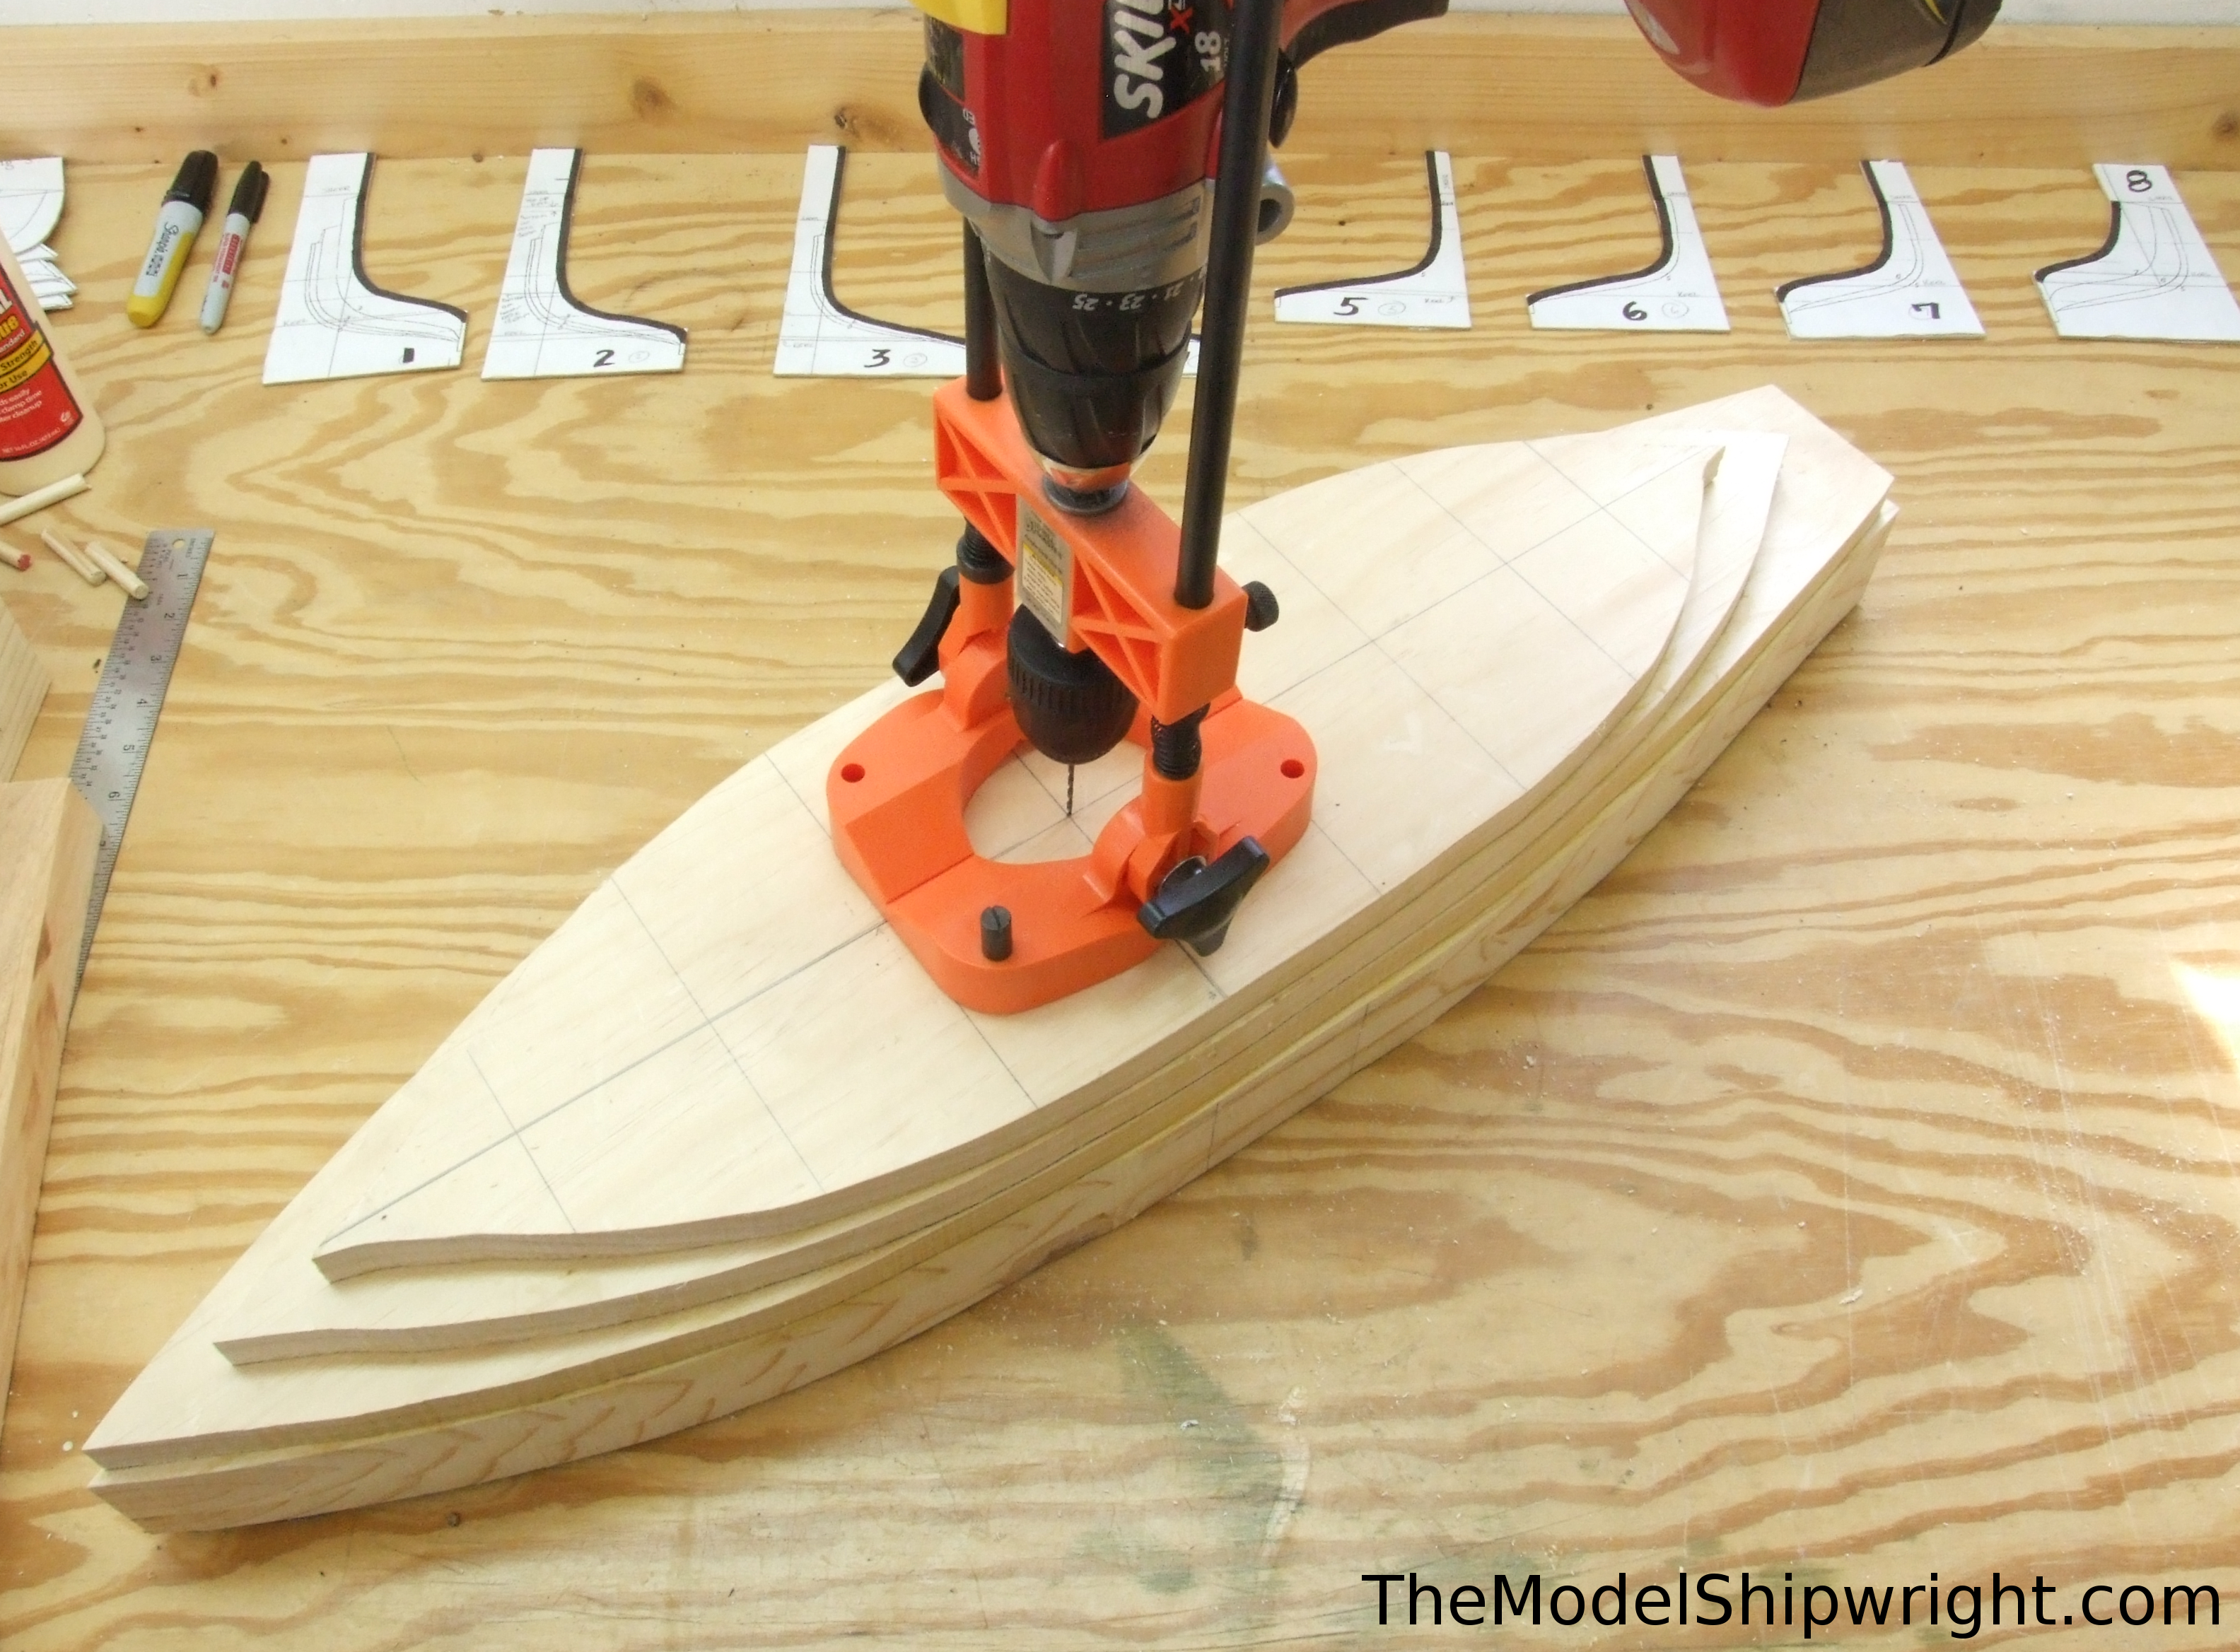
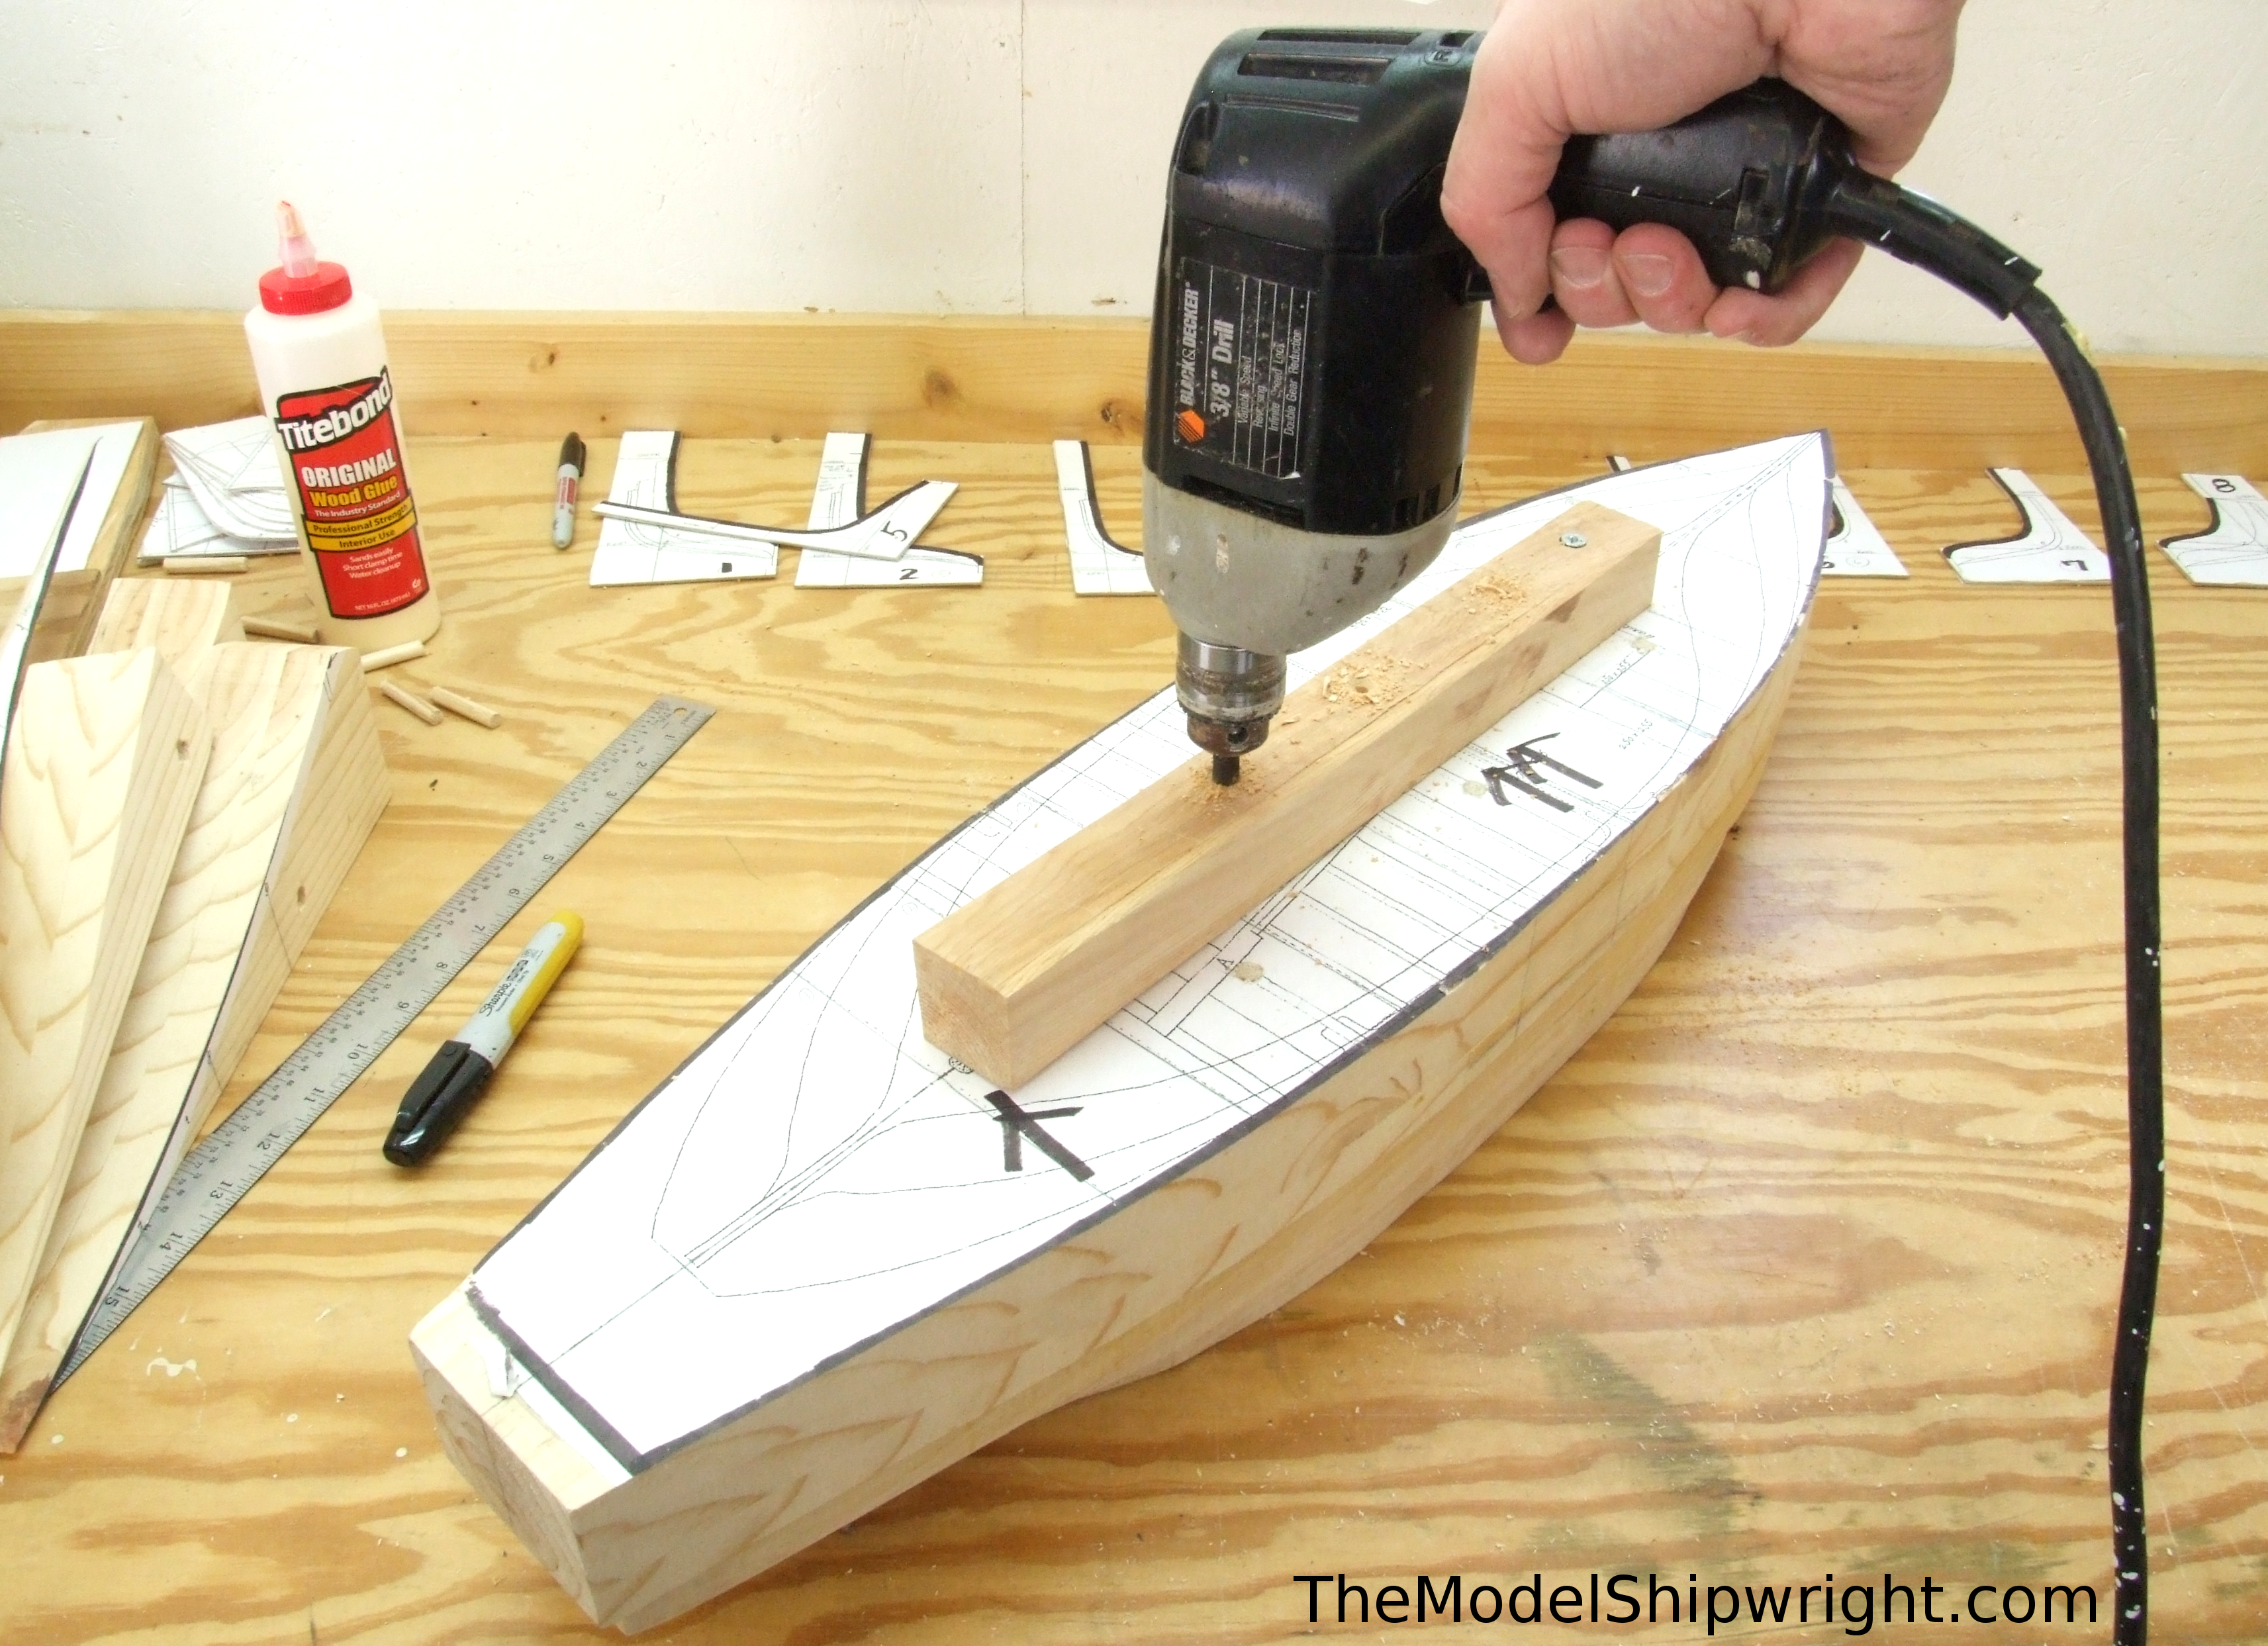
The other thing we need to do is flip the block upside down and drill holes at a 90 degree angle at the intersection of each section line and the center line, as shown in Figure 42. These will be an important reference later when you begin carving, which will quickly remove section lines you’ve drawn.
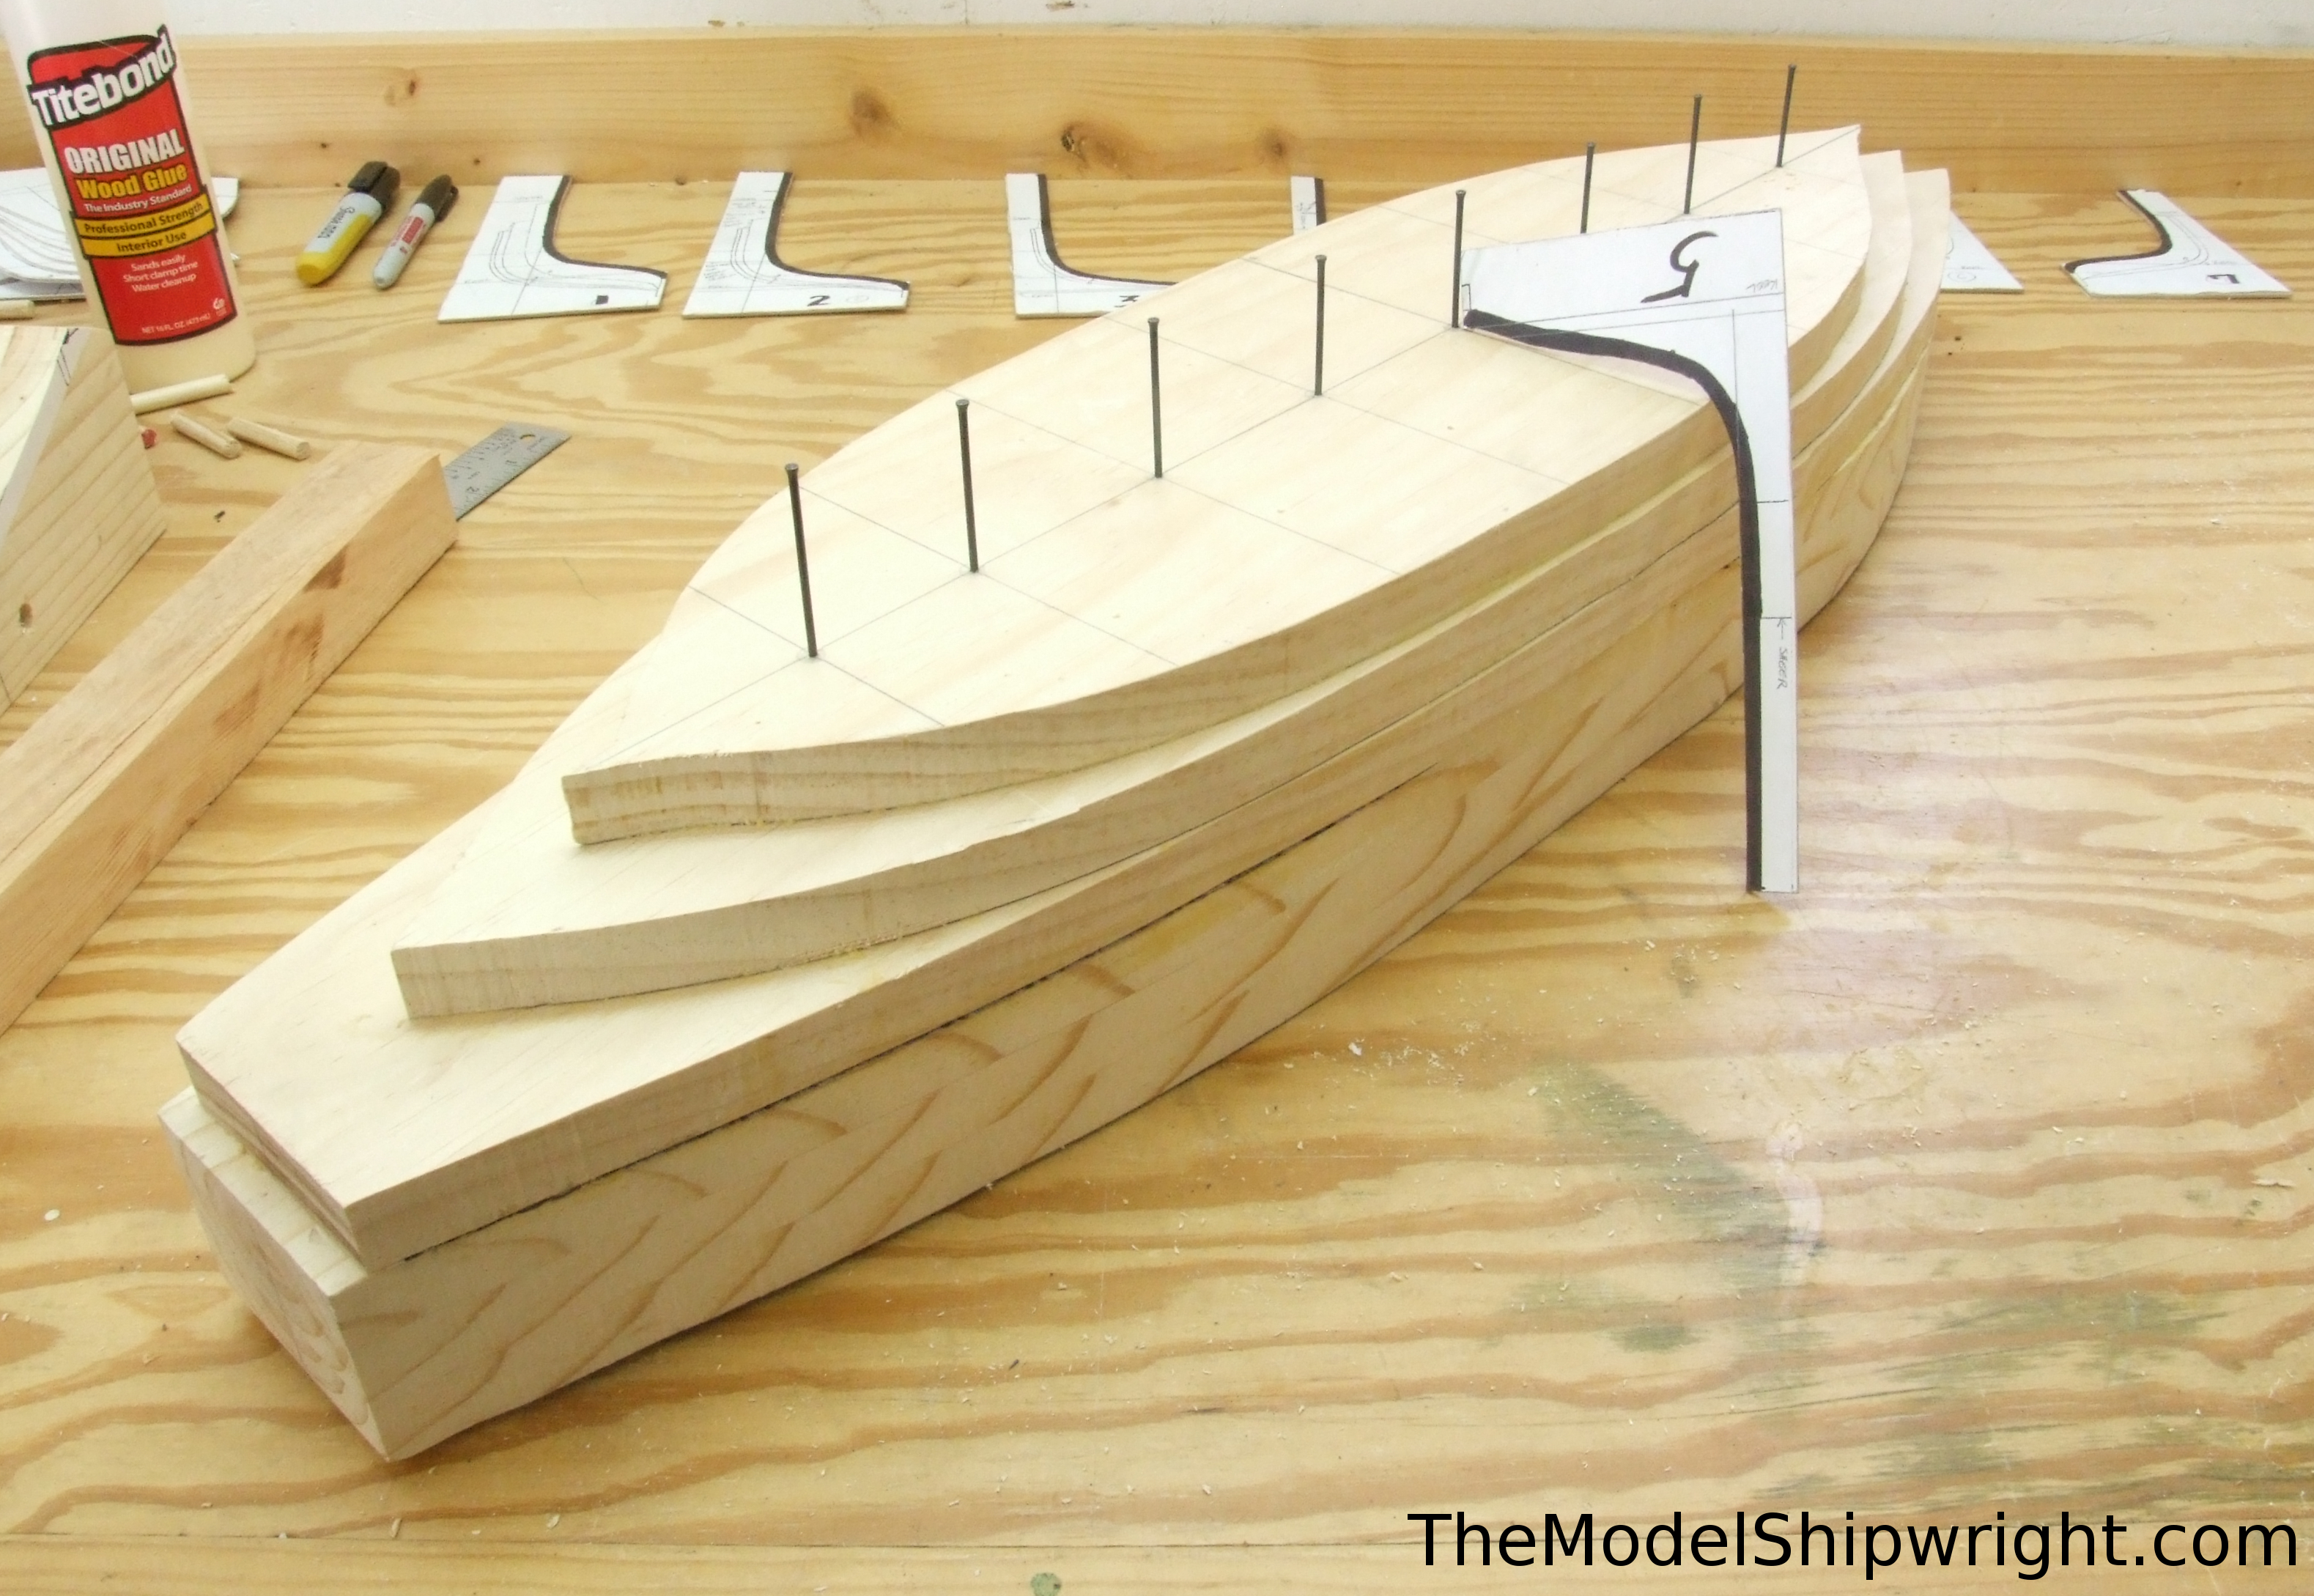
I used a 1/16” drill because I had some long wire nails that were about that diameter which could be used in the reference holes, as shown in Figure 43, to line up the templates to make sure they are held against the hull a the proper angle.
Then, we attach a piece of scrap wood with wood screws to the top of the hull as a vise block, as shown in Figure 44. This piece is what we will clamp in the vise. It prevents us from potentially damaging the hull by clamping onto it, and also gives us free access to all the areas of the hull that need to be shaped, something else that clamping on the hull itself would prevent.
This vise block will be subject to a lot of forces when we tighten the jaws of the vise onto it and begin cutting, shaping, and sanding the hull, so make sure it’s a hard piece of wood, and make sure it’s attached firmly to the hull.
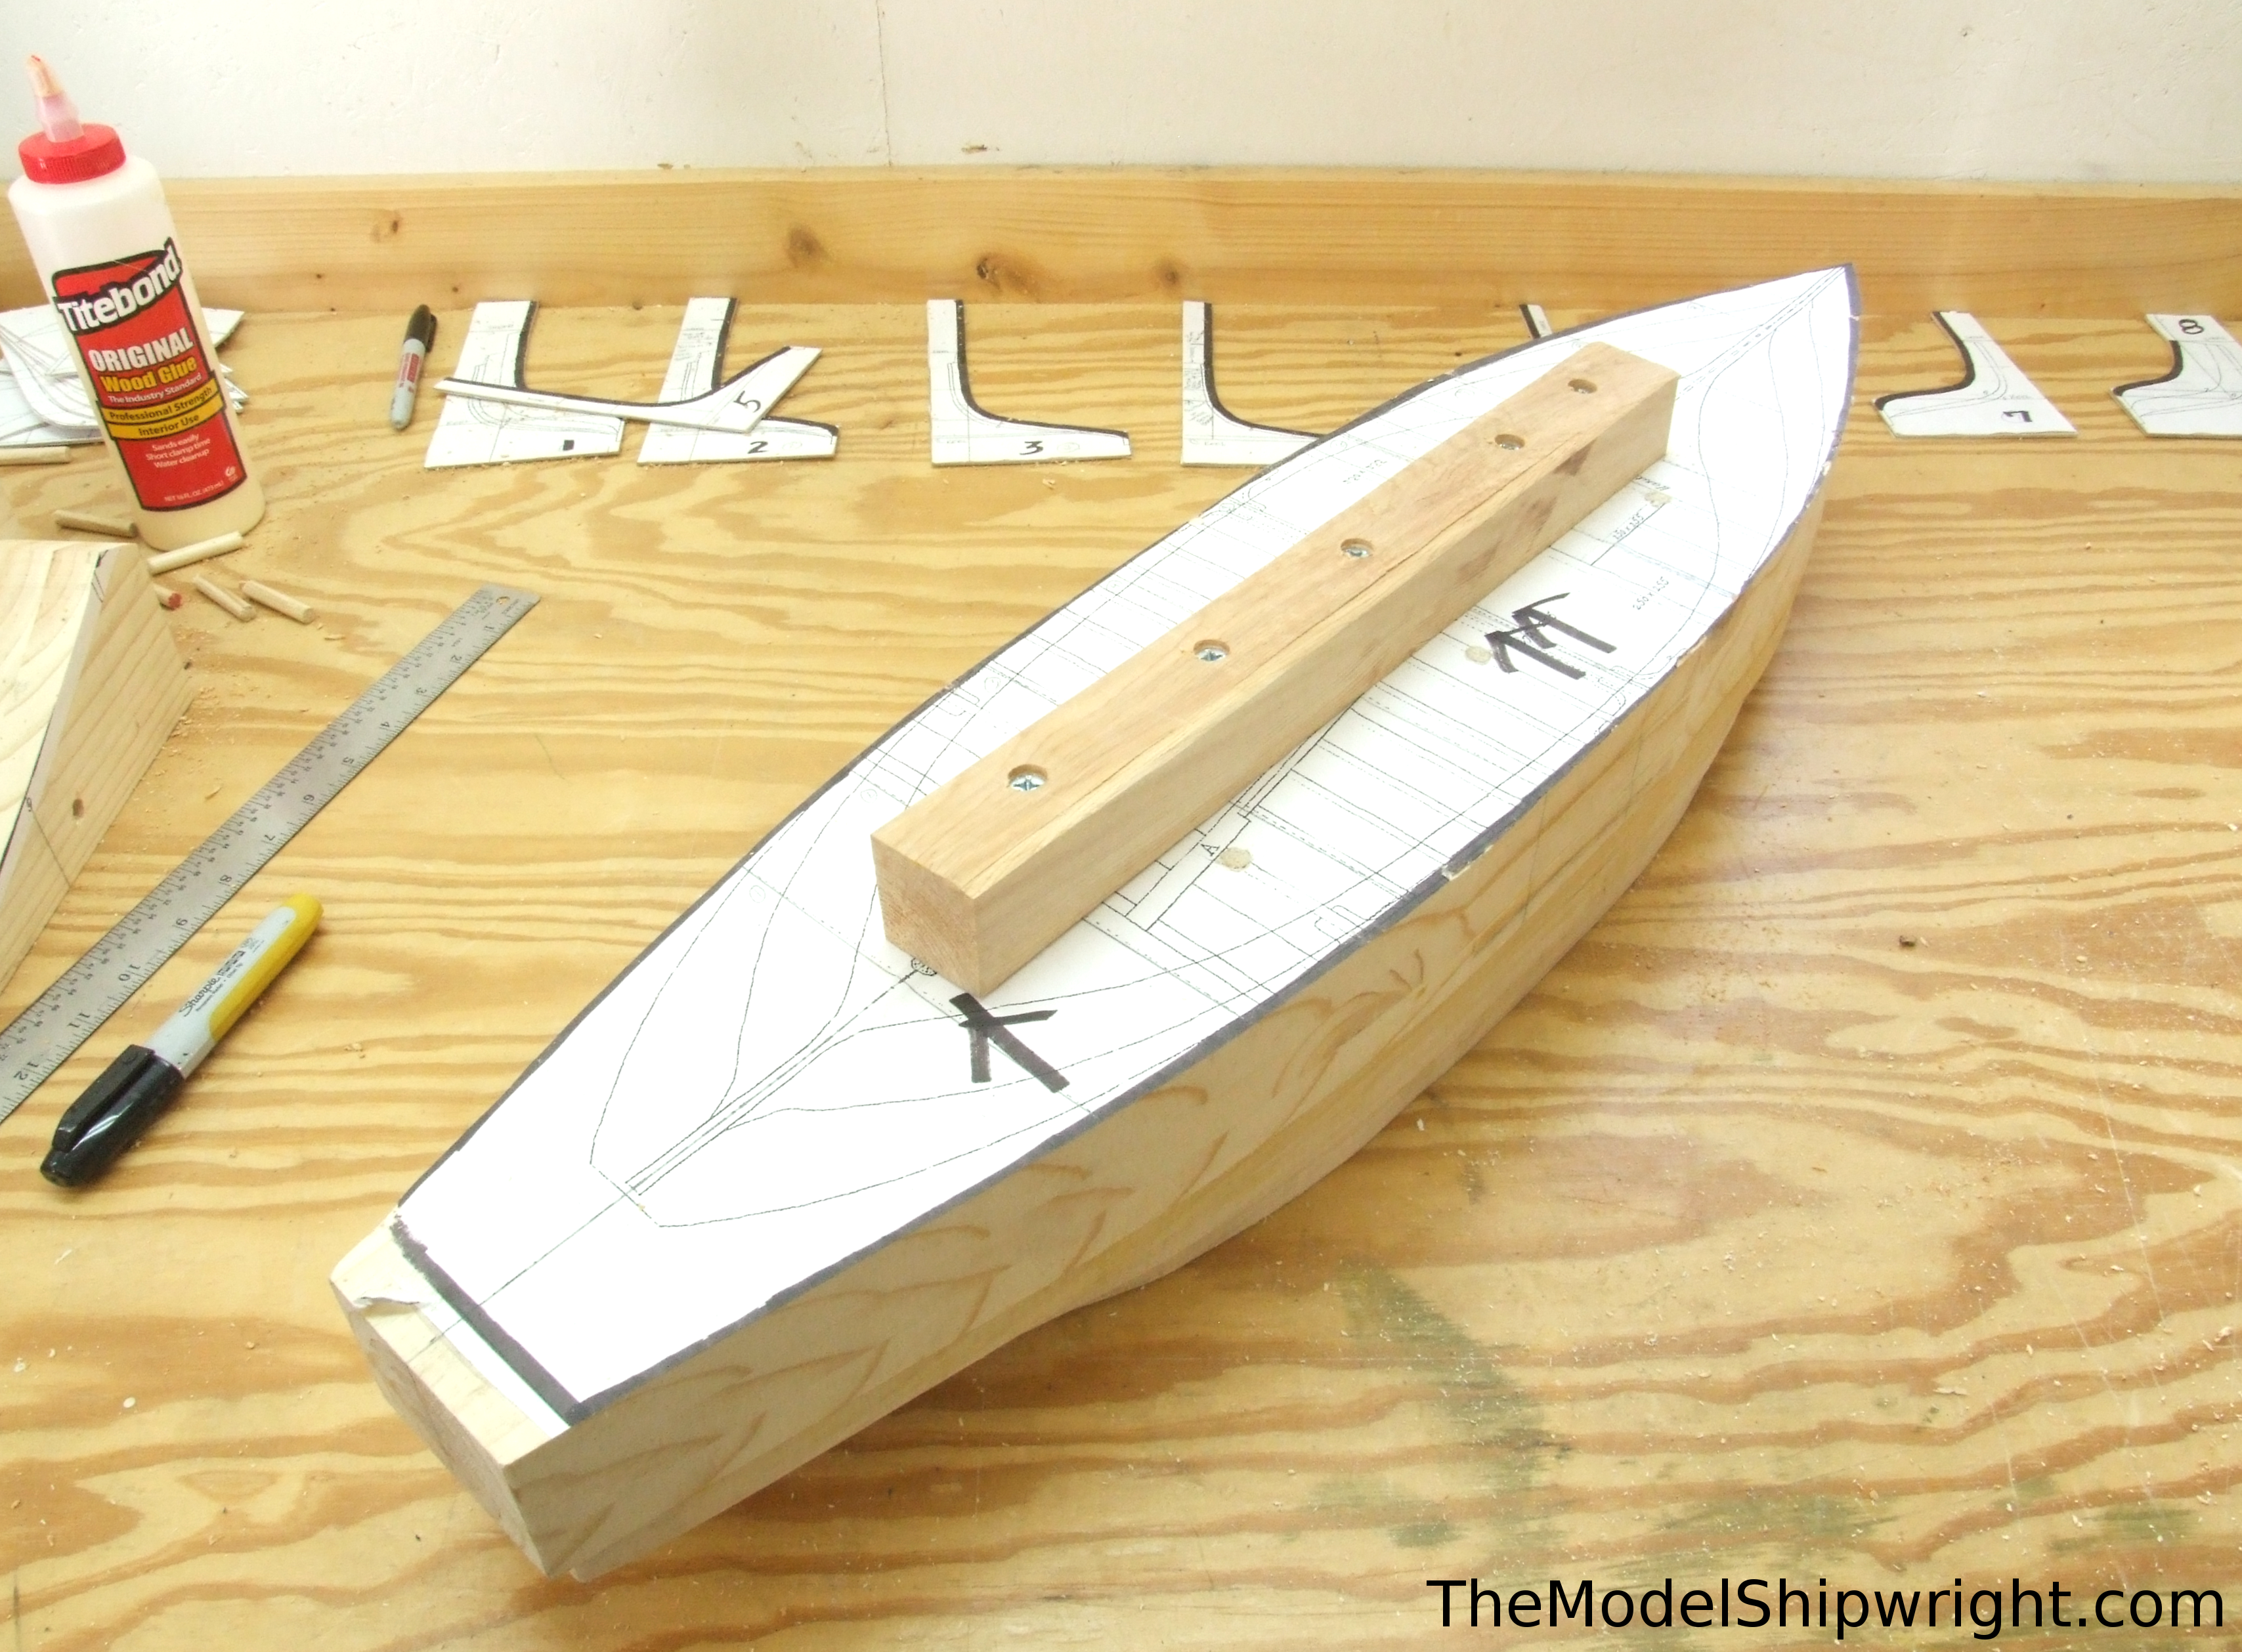
One point to watch when attaching the vise block: as shown in Figure 45, we marked the locations of the masts on the hull before fastening down the vise block to avoid driving screws into these areas. Drilling the mast holes requires a lot of precision, and a screw hole in the path of the drill bit could easily foul the whole thing up.
On Page 5 We will clamp this bad boy into our vise, and get to work shaping the hull of our version of François-Edmond Pâris’s Red Sea dhow.
Other Pages
Page 1
Page 2
Page 3
Page 4
Page 5
Page 6
*Our reprint “Selected Plates from Souvenirs de Marine” which contains this plan as well as more than 130 other ship plans, can be ordered from Amazon here.
For this project, we created three pages of plans and patterns from the original plan. We created cutting plans for the waterlines by duplicating the half-breadth plan and flipping it over to create a pattern showing the full breadth of each waterline. We also duplicated the section plan enough times to create each template needed in final shaping of the hull. Please use our Contact Page to let us know of your interest in purchasing these.